
Unlock Your Body: 8 Best Yoga Stretches for Flexibility in 2025

Let's be real, feeling as stiff as a board is no one's idea of a good time. Whether you're chained to a desk, an athlete pushing your limits, or just noticing that touching your toes feels like a distant memory, a lack of flexibility can seriously hold you back. The good news? You don't have to live with it. Yoga offers a time-tested path to unlocking your body's natural range of motion, one mindful breath at a time.
Forget the intimidating pretzel poses you see on social media. True flexibility is about functional movement, injury prevention, and simply feeling fantastic in your own skin. In this guide, we are cutting through the noise to bring you a curated list of the best yoga stretches for flexibility, period.
We'll break down each pose with no-nonsense, step-by-step instructions, highlight common mistakes to avoid, and provide game-changing modifications for every body type and skill level. We'll even explore how innovative tools like Dalm's AI-powered pose feedback can help you track your progress with precision, ensuring you stretch smarter, not just harder. Ready to transform your flexibility and feel amazing? Let's dive in.
Don't let its name fool you; this pose is less about sleepy canines and more about a full-body wake-up call. Downward-Facing Dog, or "Down Dog" for the initiated, is the MVP of yoga. It’s an iconic inverted V-shape that simultaneously stretches and strengthens everything from your fingertips to your toes, making it one of the absolute best yoga stretches for flexibility. This foundational pose lengthens the hamstrings, opens the shoulders, and decompresses the spine, all while building upper body strength.

It’s so effective, you'll find it in nearly every yoga class, from a gentle Hatha session to a powerful Vinyasa flow. It serves as a home base, a place to return to and recalibrate between more intense sequences. Think of it as a reset button for your body.
Ready to dive in? Start on your hands and knees. Tuck your toes, lift your hips high, and press back, creating that signature V-shape. It’s simple in theory, but alignment is everything.
Pro Tip: For an extra calf and hamstring stretch, gently "pedal" your feet, bending one knee and then the other. This walking motion helps ease into the pose and feels fantastic. For more ways to enhance your practice, check out our guide on how to improve your flexibility.
If your hamstrings could talk, they’d probably scream every time you bend over to pick something up. Enter the Forward Fold, a deceptively simple pose that offers profound relief. This stretch is a masterclass in surrender, asking you to fold forward and let gravity do the heavy lifting. It’s one of the best yoga stretches for flexibility because it targets the entire back line of your body, from your heels to the base of your skull.
More than just a hamstring stretch, Uttanasana calms the nervous system and relieves tension in the spine, neck, and back. It’s a staple in nearly every yoga style, from restorative flows to powerful Vinyasa sequences, often used as a transition or a moment of quiet reflection. Think of it as hitting the pause button on a hectic day.
Ready to release that tension? Start by standing with your feet hip-width apart. As you exhale, hinge from your hips-not your waist-and let your upper body hang. It sounds easy, but the details make all the difference.
Pro Tip: Grab opposite elbows to create a "ragdoll" effect. This adds a little weight, helping to gently deepen the stretch and further decompress the spine. The gentle swaying motion can feel incredibly restorative for your lower back.
If your hips could sigh with relief, this is the pose that would make it happen. Pigeon Pose is the undisputed champion of hip openers, targeting those deep, stubborn muscles like the glutes, external rotators, and hip flexors. For anyone who sits at a desk all day or athletes like runners, this pose is a non-negotiable, making it one of the best yoga stretches for flexibility you can do. It’s an intense, juicy stretch that unlocks tension you didn't even know you were holding.
This pose is a staple in Vinyasa and hip-opening classes for good reason. It’s not just about flexibility; it’s a therapeutic release that can even help alleviate sciatica-like pain. We're focusing on the "preparation" version, which is safer and more accessible for most bodies.
Let's get those hips happy. From a tabletop or Downward-Facing Dog, bring your right knee forward towards your right wrist. Your shin will angle across the top of your mat.
Pro Tip: Breathe deeply into any discomfort. Hips are notorious for storing emotional tension, so don't be surprised if the stretch feels intense. Hold the pose and breathe through it. For guidance on how long to stay in this powerful stretch, explore our article on how long to hold yoga poses.
Prepare for a gentle takeoff into the world of open hips with Butterfly Pose. This seated groin and inner thigh stretch is a true gift for anyone chained to a desk all day. Baddha Konasana, as it's known in Sanskrit, targets the adductors (inner thighs) and hip flexors with a quiet intensity, making it one of the most accessible and best yoga stretches for flexibility. It’s a foundational pose beloved in restorative and prenatal practices for its ability to create space and relieve tension in the pelvis.
This pose isn't about aggressive stretching; it's about surrendering to gravity. Think of it as a friendly negotiation with your hips, encouraging them to release their grip. It’s a staple in foundational flexibility programs and is particularly beneficial for improving external rotation in the hips, a key component of overall mobility.
Ready to let your hips fly? Sit down, bring the soles of your feet together, and let your knees fall out to the sides. It sounds simple, but a few tweaks can transform the entire experience.
Pro Tip: Don't worry if your knees are high off the ground; flexibility comes with time and consistency. For a more restorative version, place blocks under your knees for support and hold the pose for several minutes, focusing on deep, relaxing breaths.
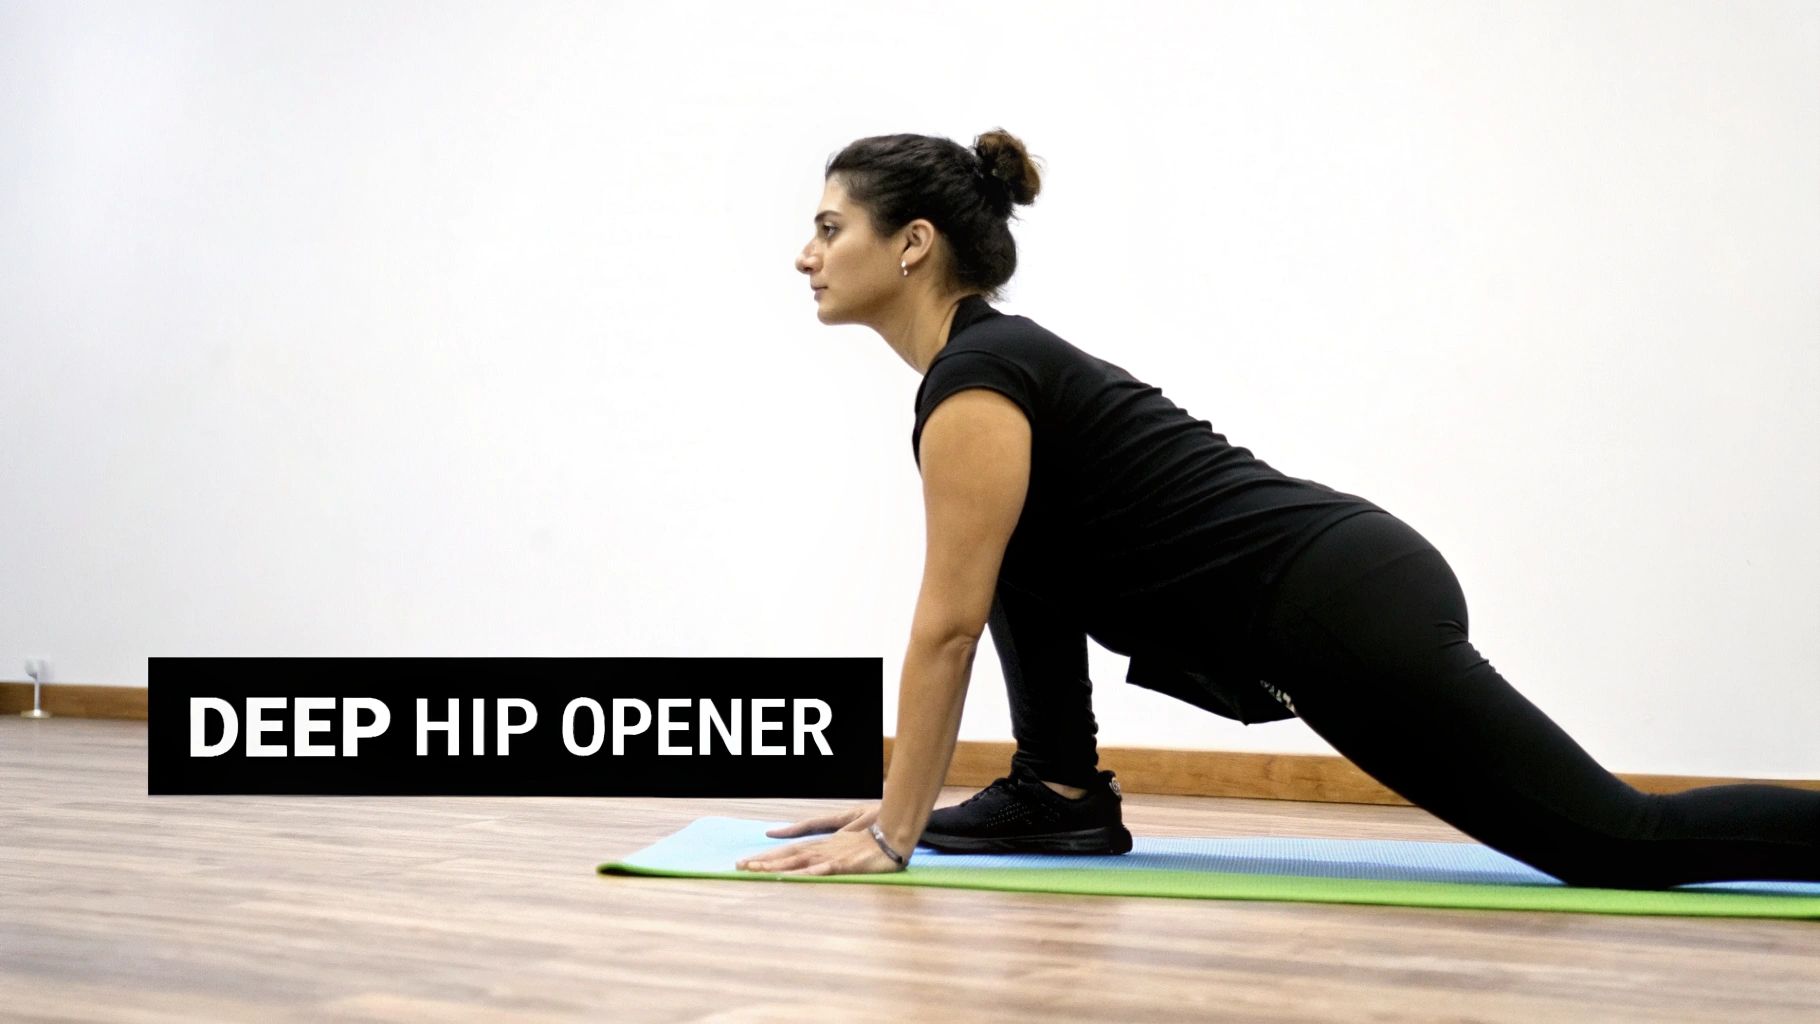
If you've ever felt that your hips are locked up tighter than a high-security vault, meet your new best friend: the Low Lunge. This pose is a deep, satisfying stretch that primarily targets the hip flexors and quads, making it a godsend for desk jockeys and athletes alike. It's a foundational stretch that combines lengthening with stability, proving it’s one of the best yoga stretches for flexibility, especially in the lower body. Anjaneyasana is a star player in dynamic Vinyasa flows and a secret weapon for runners looking to release post-run tension.
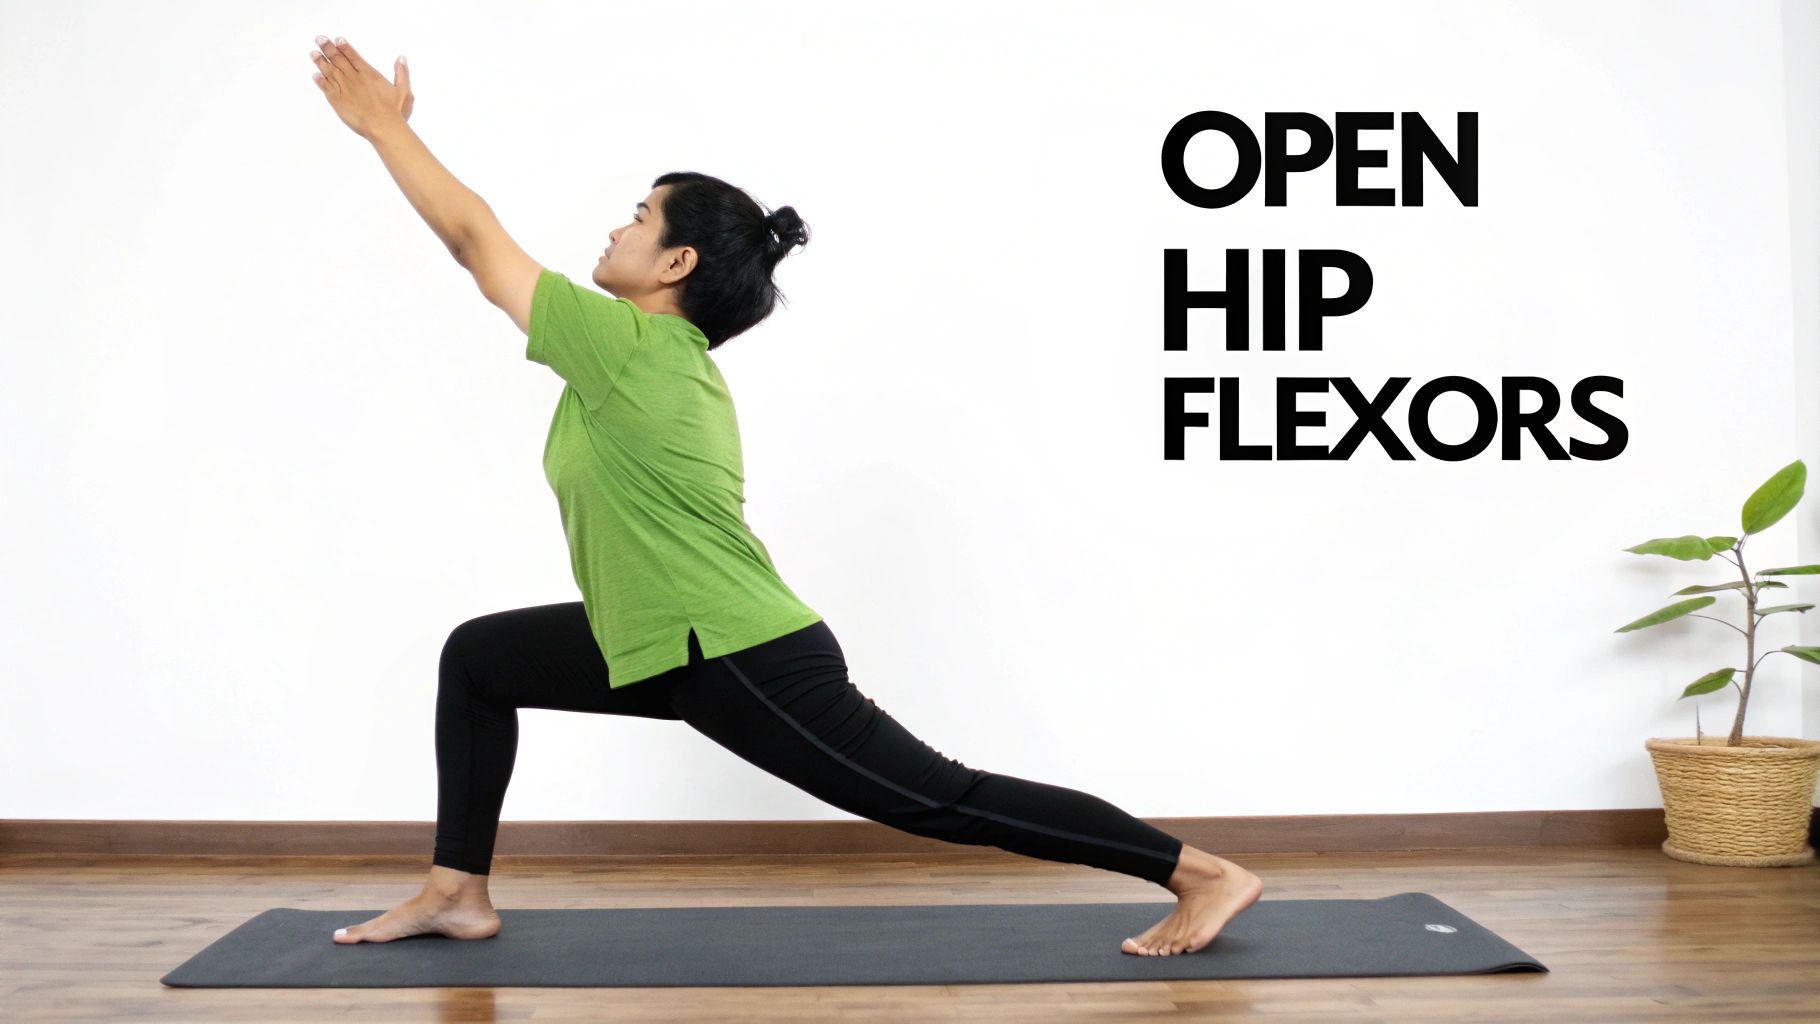
This pose isn't just about sinking into a deep stretch; it's about actively creating space in the front line of your body. By isolating and opening the psoas muscle, a major hip flexor, it can help alleviate tightness that contributes to lower back pain. Think of it as hitting the "unlock" button for your hips.
Ready to release those hips? Start from a tabletop or Downward Dog position. Step one foot forward between your hands, then gently lower your back knee to the mat.
Pro Tip: To get the most out of this pose, ease into it slowly rather than forcing the stretch. Proper preparation is essential for a safe practice. For great ways to prepare your body, explore these effective yoga warm-up exercises.
If the traditional Pigeon Pose makes your knees scream, allow us to introduce its kinder, gentler cousin: the Supine Figure Four. This stretch is the reclined, chilled-out version that delivers all the hip-opening, glute-releasing goodness without putting pressure on your joints. It’s a game-changer for anyone with tight hips or sensitive knees, easily making it one of the best yoga stretches for flexibility. By lying on your back, you use gravity to your advantage, allowing for a deep, controlled stretch that targets the piriformis and outer hip muscles.
This pose is a staple in restorative and therapeutic yoga classes for a reason. It provides immense relief for lower back pain and sciatica by releasing tension in the glutes, which often contributes to discomfort. Think of it as a safe and effective way to untie the stubborn knots in your hips.
Ready to recline and unwind? Start by lying flat on your back with your knees bent and feet flat on the floor, hip-width apart.
Pro Tip: Keep your lower back and tailbone connected to the floor as much as possible to isolate the stretch in your hip. If you can’t reach your thigh, loop a yoga strap or towel around it for an easier grip.
Time to untie the knots your daily life has tied into your spine. The Seated Spinal Twist is like hitting the wring cycle for your back, twisting out tension and boosting mobility. This pose isn't just a feel-good stretch; it's a critical movement for maintaining a healthy, flexible spine, making it one of the best yoga stretches for flexibility. It targets the often-neglected rotational plane of motion, stretching your glutes, hips, and shoulders in the process.
From Hatha classes to physical therapy sessions, this twist is universally praised for its ability to improve spinal range of motion and relieve tightness from sitting all day. It’s the perfect antidote to a stiff back, providing a deep, therapeutic release that feels both energizing and restorative.
Ready to twist and shout? This pose is all about lengthening before you rotate. Start seated with your legs extended in front of you.
Pro Tip: Imagine your spine is a spiral staircase. With every inhale, lengthen upwards, and with every exhale, see if you can gently twist a little deeper. Avoid forcing the rotation; let your breath guide you into the stretch.
Get ready for a pose with a peculiar name and powerful results. Cow Face Pose is the ultimate multitasker, delivering a profound stretch to your hips, shoulders, chest, and arms all at once. It might look like a human pretzel, but this seated pose is one of the best yoga stretches for flexibility, targeting stubborn tightness in the outer hips and releasing deep-seated tension in the shoulder girdle.
This pose is a favorite in therapeutic yoga styles like Iyengar and is fantastic for anyone who spends long hours hunched over a desk or computer. It works by internally rotating one shoulder and externally rotating the other, a unique combination that dramatically improves your range of motion and helps correct poor posture.
This pose can be intense, so ease into it with patience and mindful breathing. Start seated with your knees bent. Cross one knee directly over the other, stacking them as best you can. Your feet should be on opposite sides of your hips.
Pro Tip: Focus on getting your hips set up correctly before adding the arms. If the full leg position is too much, start by simply crossing your legs in a more relaxed position (like Sukhasana) and work solely on the arm stretch. Remember to practice both sides
You've just navigated a treasure map of the best yoga stretches for flexibility, from the foundational strength of Downward-Facing Dog to the deep release of Pigeon Pose. The poses themselves are just one part of the equation. The real secret to unlocking a more limber, mobile body isn't about contorting yourself into a pretzel overnight; it’s about the quiet, consistent effort you put in day after day.
Think of your flexibility journey like learning a new language. You wouldn't expect to become fluent after one lesson. Likewise, a single session of stretching feels good, but true, lasting change comes from integrating these poses into the rhythm of your life. This isn't about adding another stressful "to-do" to your list. It's about gifting yourself moments of mindful movement.
The path from knowing to doing is where the magic truly unfolds. You don’t need an hour every day. Start small and build momentum.
Remember the golden rule: listen to your body. Flexibility isn't a race or a competition. Your journey is uniquely yours. Some days you'll feel open and spacious, while other days you might feel tight and restricted. Honor that reality. The goal is progress, not perfection. Celebrate the small victories, like reaching an inch further or feeling a little less strain in a familiar pose.
Ultimately, mastering these yoga stretches for flexibility is about more than just touching your toes. It’s about creating a more comfortable and resilient body that can carry you through life with greater ease. It’s about reducing the risk of injury, alleviating chronic aches, and cultivating a deeper connection between your mind and your movements. You now have the blueprint. The next step is simply to begin.
Ready to take the guesswork out of your alignment and accelerate your progress? Dalm uses advanced AI to provide real-time feedback on your poses, acting as your personal digital yoga instructor. Get instant guidance on the very stretches you've learned today and ensure you're practicing safely and effectively by visiting Dalm.


