
How to Do Downward Facing Dog a Complete Guide for Yogis
If you’re wondering how to do downward facing dog, picture this: your body forming an inverted 'V' shape. Your hands are planted about shoulder-width apart, your feet are hip-width, and your hips are soaring up toward the sky. The big secret here? It’s all about a long, straight spine, not straight legs. So go ahead, bend those knees generously. This classic yoga pose is a powerhouse, stretching the entire backside of your body while giving your upper body a serious workout.
If yoga poses had a royal court, Downward Facing Dog—or Adho Mukha Svanasana in Sanskrit—would absolutely be the queen. It’s so much more than a simple transition or a place to catch your breath. Think of it as a full-body reset button that you’ll find in almost every style of yoga, from a sweaty Vinyasa flow to a gentle Hatha class. It's the ultimate multitasker, building strength in your arms and shoulders while giving your hamstrings, calves, and spine that delicious, much-needed stretch.
And people love this pose. Its global appeal is real. On November 23, 2019, a staggering 864 people came together in Jaipur, India, to hold the pose at the same time, setting a mind-blowing world record. You can actually read more about this massive yoga gathering and its amazing achievement. This isn't just a stretch; it's a worldwide phenomenon.
At its heart, Downward Dog is like a diagnostic tool for your body. It instantly tells you where you’re holding tension. Are your hamstrings absolutely screaming at you? Is your lower back rounding like a scared cat? Shoulders feeling tight and bunched up by your ears? The pose gives you immediate, honest feedback, inviting you to breathe and create space exactly where you need it most.
But it’s not just physical. By dropping your head below your heart, you’re giving your nervous system a chance to chill out, which can help melt away stress and even mild fatigue. It’s an active posture that, paradoxically, feels incredibly restorative.
Downward Dog isn’t about forcing your body into a perfect, geometric shape. It's about finding that sweet spot between effort and ease for your body, creating a moment of active recovery that makes you stronger and longer all at once.
Before we get into the nitty-gritty of alignment, let's zoom out and look at the main goals. Getting comfy in this pose just means focusing on a few key actions. Think of this as your mental roadmap for what we're about to build.
This table is your cheat sheet! Keep these simple cues in mind as we break down the pose step-by-step.
Let's forget about rigid, numbered steps for a second. The best way to feel your way into a great Downward Facing Dog is to build it from the ground up, piece by piece. We'll start on all fours in a tabletop position—it's the perfect neutral launchpad for your spine and joints.
Your hands are everything here. Think of them as your foundation. Spread your fingers as wide as you can, like you're making starfish prints on your mat. Press down firmly through all ten fingertips and the base of your knuckles. This little trick creates a rock-solid base, spreads the weight evenly, and saves your wrists from taking all the heat. It’s like you’re creating little suction cups with your palms.
Okay, from that solid tabletop, tuck your toes under and take a nice, deep breath in. As you breathe out, start lifting your hips high. Send them up and back, aiming for that corner where the wall behind you meets the ceiling. This is the big move, the one that creates that classic inverted 'V' shape we all know.
But here’s the secret sauce for a happy spine: bend your knees. Seriously, bend them a lot! Getting a long, straight line from your hands to your hips is way more important than forcing your heels to the floor with straight legs. A bent-knee Down Dog lets you tilt your pelvis just right, creating this incredible line of energy all the way from your wrists to your tailbone.
This simple breakdown shows the whole flow: Ground, Lift, and then Lengthen.
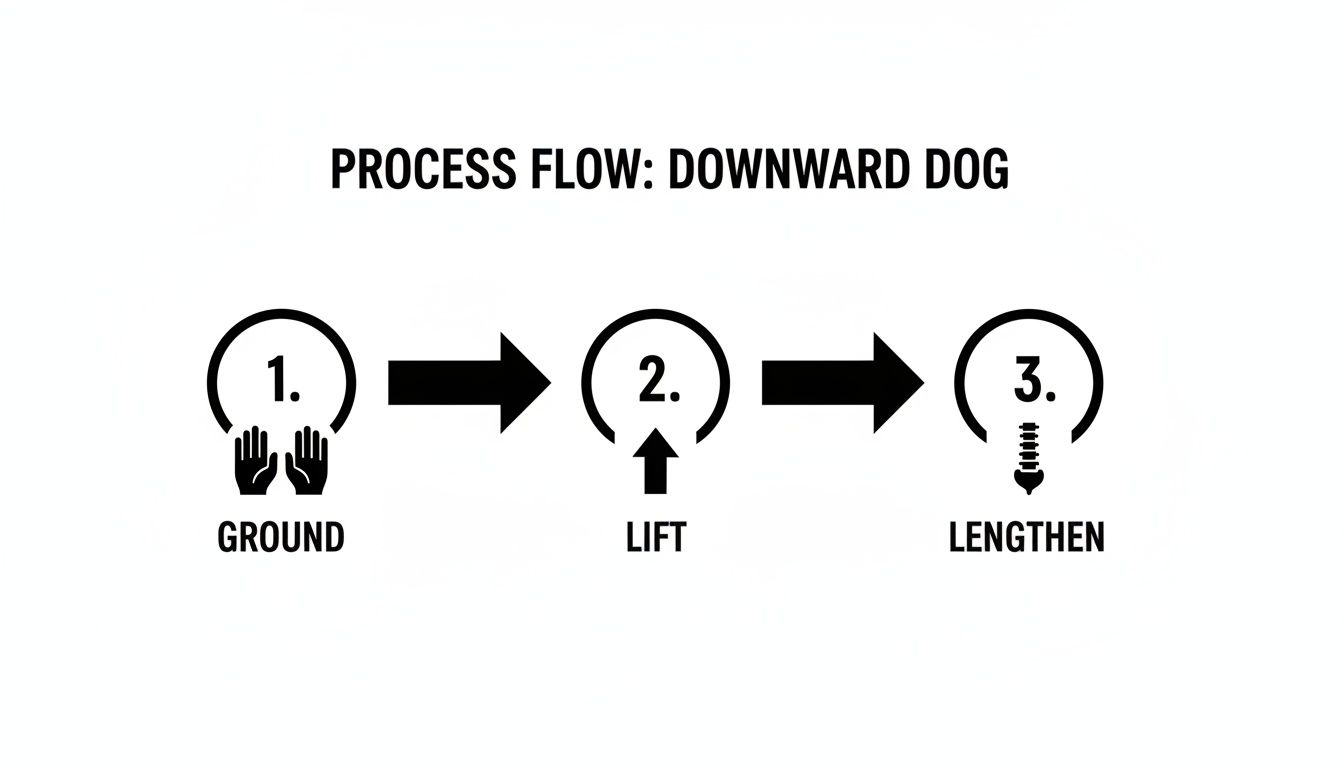
Thinking about it this way—foundation first, lift second—is what truly unlocks that amazing spinal extension.
Once you're up and in the basic shape, the real magic begins with the micro-adjustments. These tiny shifts are what turn a simple stretch into a full-body, "aha!" moment.
First up, let's talk shoulders. Gently roll your upper arms outward, so your biceps spin toward the front of the room. A good mental cue is to imagine you're trying to show off your armpits to whatever is in front of you. This one small move does two fantastic things:
Next, bring your focus to your core. Subtly draw your belly button toward your spine. This isn't about sucking in your gut for a photo; it’s a gentle hug that supports your lower back and stops your ribs from poking out.
Think of your Downward Dog as a dynamic conversation with your body. It's constantly offering feedback. A little bend here, a slight rotation there—these adjustments are your responses, making the pose uniquely yours.
From this place, you can start to play. Gently "pedal out" your feet by bending one knee deeply, then the other. It’s a fantastic way to coax your hamstrings into opening up. If and when you feel ready, you can start to work your heels toward the floor, but only if you can keep that glorious length in your spine.
Before you know it, you’ll be flowing through this foundational pose with confidence. Just remember, a good practice always starts with a proper warm-up. We've got some great ideas in our guide to essential yoga warm-up exercises to get your body ready.
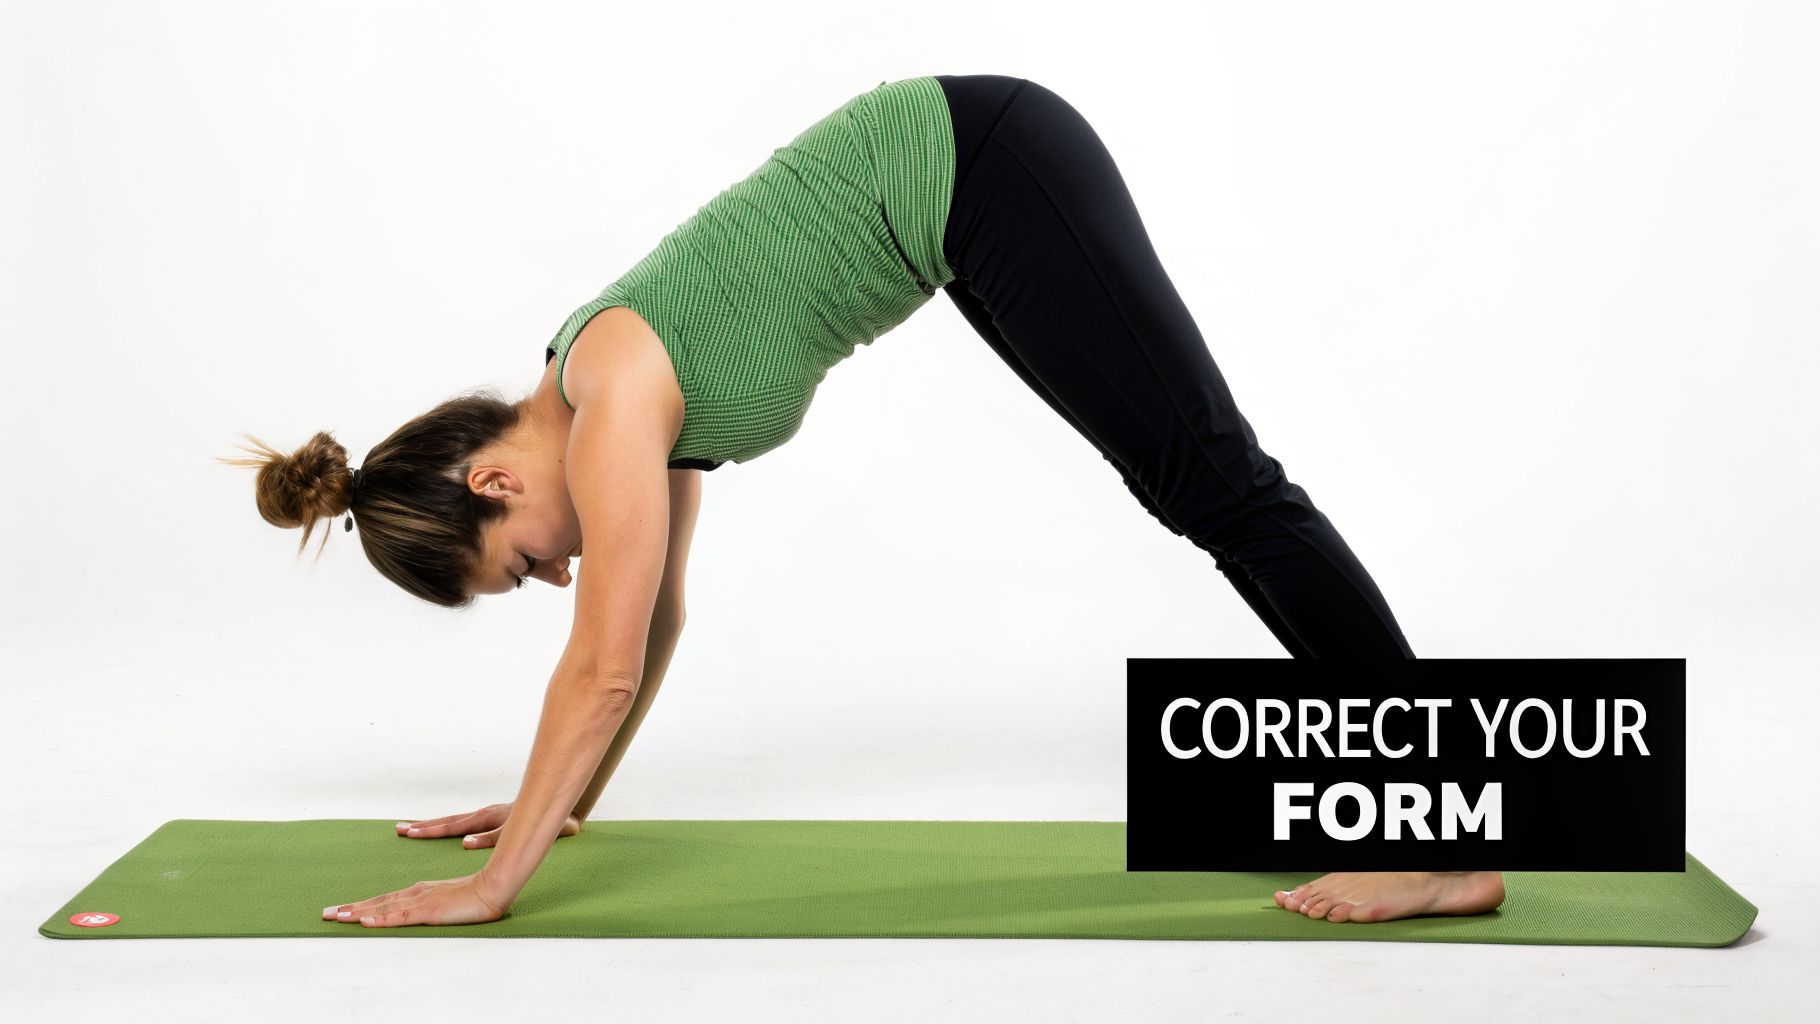
Feeling a little lost in your Downward Dog? If the pose feels more awkward than awesome, you're definitely not alone. It's a surprisingly complex position, and a few common alignment hiccups can throw the whole thing off. Let's troubleshoot some of the biggest culprits so you can finally find that sweet spot.
First up, let's talk about the dreaded "Quasimodo" back—that familiar rounding of the spine that happens when we get obsessed with straightening our legs. This is probably the number one thing I see students struggle with when they're learning how to do downward facing dog.
The Fix: Bend your knees! Seriously. Bend them a lot, until you can feel your tailbone tilting up toward the sky. This one simple move instantly frees up your pelvis, allowing your spine to lengthen into a beautiful, straight line from your wrists all the way to your hips. Your spine's happiness is always the top priority here.
Next on the list are the shoulders. They just love to creep up toward the ears as if they're wearing them for earrings, don't they? This creates a ton of unnecessary tension in your neck and upper back, making the pose feel strained instead of spacious.
To fix this, think about externally rotating your upper arms. It sounds technical, but it’s simple: try to spin your biceps forward, toward the front of your mat. You’ll feel your shoulder blades glide down your back and a new sense of openness across your collarbones. This creates a stable, supportive shelf for your upper body.
Another common pitfall is dumping all your weight into the heels of your hands, which is a fast track to sore wrists.
Okay, let's bust a huge myth right now: your heels do not have to touch the floor. Forcing them down when your hamstrings aren't ready is a surefire way to round your low back and put strain where you really don't want it. Instead, keep your heels lifted and focus on sending energy back and down through your legs.
Believe it or not, this pose is frequently misunderstood. It’s often thrown into classes as a "resting pose," yet it’s not truly for beginners. Clinicians with deep yoga experience warn that its constant use can lead to overuse injuries, with thousands of preventable cases of neck and pelvic issues stemming from poor form. For the 44% of the 300 million global yoga practitioners who practice multiple times a week, nailing this alignment is crucial for long-term safety. You can discover more about the complexities of Downward Dog on Garner Pelvic Health.
Finally, let your head hang heavy. There's no need to crank your neck to look at your hands or your belly button. Just release it and let your head be a natural extension of your spine. Building this kind of body awareness is key to a sustainable practice. For more on this, check out our guide to postural awareness exercises.
Let’s be real: yoga is never a one-size-fits-all deal. This is especially true for a pose as fundamental as Downward Facing Dog. Your body is yours alone, and your practice should reflect that. The goal here is to feel supported and long, not to cram yourself into a shape that feels painful or just plain weird. The secret is finding the right tweaks that honor how your body feels today.

If you’re battling tight hamstrings or your wrists are screaming in protest, forcing a "perfect" shape will only lead to frustration or injury. Instead, we’re going to make the pose come to you. Using props isn't a sign of weakness; it’s a sign of a smart, sustainable practice.
Think of modifications not as "cheating," but as powerful tools to unlock the true benefits of the pose. They allow you to find stability and length, which is the entire point of Downward Dog.
So, let's get practical. If your wrists are sending you angry messages every time you press back, it’s time to change the angle. Try placing yoga blocks under your hands. This simple elevation reduces that sharp bend in your wrists and cleverly shifts more of the workload back to your legs.
For those stubbornly tight hamstrings (you know who you are!), the best fix is a game-changer: bend your knees deeply. Seriously, bend them a lot. Another fantastic option is "Puppy Pose." You just keep your knees on the mat, walk your hands forward, and let your chest melt toward the floor. It gives you a similar delicious spinal stretch without asking so much from your hamstrings.
For years, inversions like Down Dog were on the "maybe not" list during pregnancy, but thankfully, that old-school thinking has evolved. A groundbreaking 2015 study looked at 26 different poses and cleared Downward Dog as safe and supportive for moms even in their third trimester, finding no adverse effects. You can read up on these important prenatal yoga findings for yourself. This is incredible news for the millions of yogis in major markets like the U.S. and India.
Now, if you're a seasoned practitioner looking to spice things up, variations can add a whole new dimension. From a solid Downward Dog, try lifting one leg straight back behind you into Three-Legged Dog. This move will fire up your core and glutes while seriously testing your balance. Just remember to keep your hips level at first to build stability before you play with opening the hip. From there, you can flow into all sorts of other poses, turning your Down Dog into a dynamic launchpad for the rest of your practice.
What if you had a personal yoga teacher in your pocket, ready to whisper an alignment cue right when you need it? That’s not some far-off fantasy—it's what you get with Dalm. Trying to master the finer points of Downward Facing Dog on your own often feels like fumbling in the dark. With an AI ally, you can stop guessing and start practicing with total confidence.
Dalm uses your device's camera to act as a second set of expert eyes. As you settle into Adho Mukha Svanasana, our AI gets to work, analyzing your form with incredible precision and comparing your alignment against key anatomical checkpoints. This isn't just about making a pretty shape; it’s about building a safer, stronger, and more effective pose from the ground up.
Picture this: you're holding your Down Dog, feeling that familiar deep stretch in your hamstrings. Suddenly, a calm voice from your device suggests, "Send more weight back into your heels." Or maybe, "Broaden across your collarbones to create space for your neck." That’s Dalm in action.
This screenshot shows exactly how Dalm gives you on-screen guidance while you practice.
The visual cues point out specific areas, like the angle of your spine or the height of your hips, giving you a clear, simple roadmap for what to adjust. It’s the next best thing to having a private instructor right there with you, guiding you to that perfect "aha!" moment of alignment.
This isn't just some canned advice, either. The feedback is tailored to your body, right in that moment. It helps you connect with the feeling of correct alignment, which is a total game-changer for building muscle memory and learning way faster than you would on your own.
One of the best feelings in yoga is looking back and seeing how far you've come. Dalm makes this easy by tracking your alignment and consistency over time. You can actually see measurable improvements in your flexibility, strength, and balance, turning vague goals into real, tangible wins.
Dalm doesn’t just show you how to do Downward Facing Dog once. It helps you refine and perfect it every single time you step on the mat, building a practice that’s both intelligent and intuitive.
This is about more than just numbers; it’s about celebrating your personal journey. You can see how that once-stiff spine has started to lengthen, or how your weight distribution has evened out, which is incredibly motivating. This smart approach helps you build a safer and more effective routine.
Want to geek out on how it all works? You can learn more by exploring our guide to posture analysis software. With Dalm, every practice is a genuine step forward.
Even a pose as familiar as Downward Facing Dog can leave you scratching your head. If you've ever felt that nagging ache in your wrists or secretly wondered if your heels are supposed to touch the ground, you're not alone. Let's tackle some of the biggest mysteries about this classic pose so you can get back on your mat with total confidence.
The number one complaint I hear? Wrist pain. If your wrists are barking at you every time you pop into Down Dog, it's a huge red flag that your weight is in the wrong place.
Think "starfish hands." Your mission is to press down firmly through all ten fingertips and the knuckles where your fingers meet your palm. This one simple shift takes the pressure off your delicate wrist joint and spreads it across your entire hand, where it belongs.
Ah, the million-dollar question. The short answer? Absolutely not. In fact, forcing your heels to the floor when your hamstrings are screaming "no!" is a fast track to a rounded, unhappy spine.
Your top priority in any Downward Dog is creating a long, straight line from your hands all the way up to your hips. If bending your knees and lifting your heels high helps you get that beautiful length, then that is the perfect pose for you right now.
Ditch the idea that heels-on-the-floor is the gold standard. A Down Dog with deeply bent knees and a long, glorious spine is infinitely better for your body than one with straight legs and a hunched-over back.
Trust the process. As you keep practicing, your hamstrings and calves will gradually open up, and your heels will naturally start to creep closer to the mat.
How long you hold the pose really boils down to the type of yoga class you're in. It's all about context.
If you're just starting out, aim to hold the pose for three complete, juicy breaths. Focus on feeling good in the pose, not on hitting a specific time. If you feel any pinching or your form starts to get sloppy, it’s time to come down and rest. Your body is your best guide—always listen to what it's telling you.
Ready to stop guessing and start getting it right? Dalm gives you AI-powered pose analysis and real-time voice feedback for personalized guidance on the mat. Track your progress and build a safer, stronger practice at https://dalm.co.


