
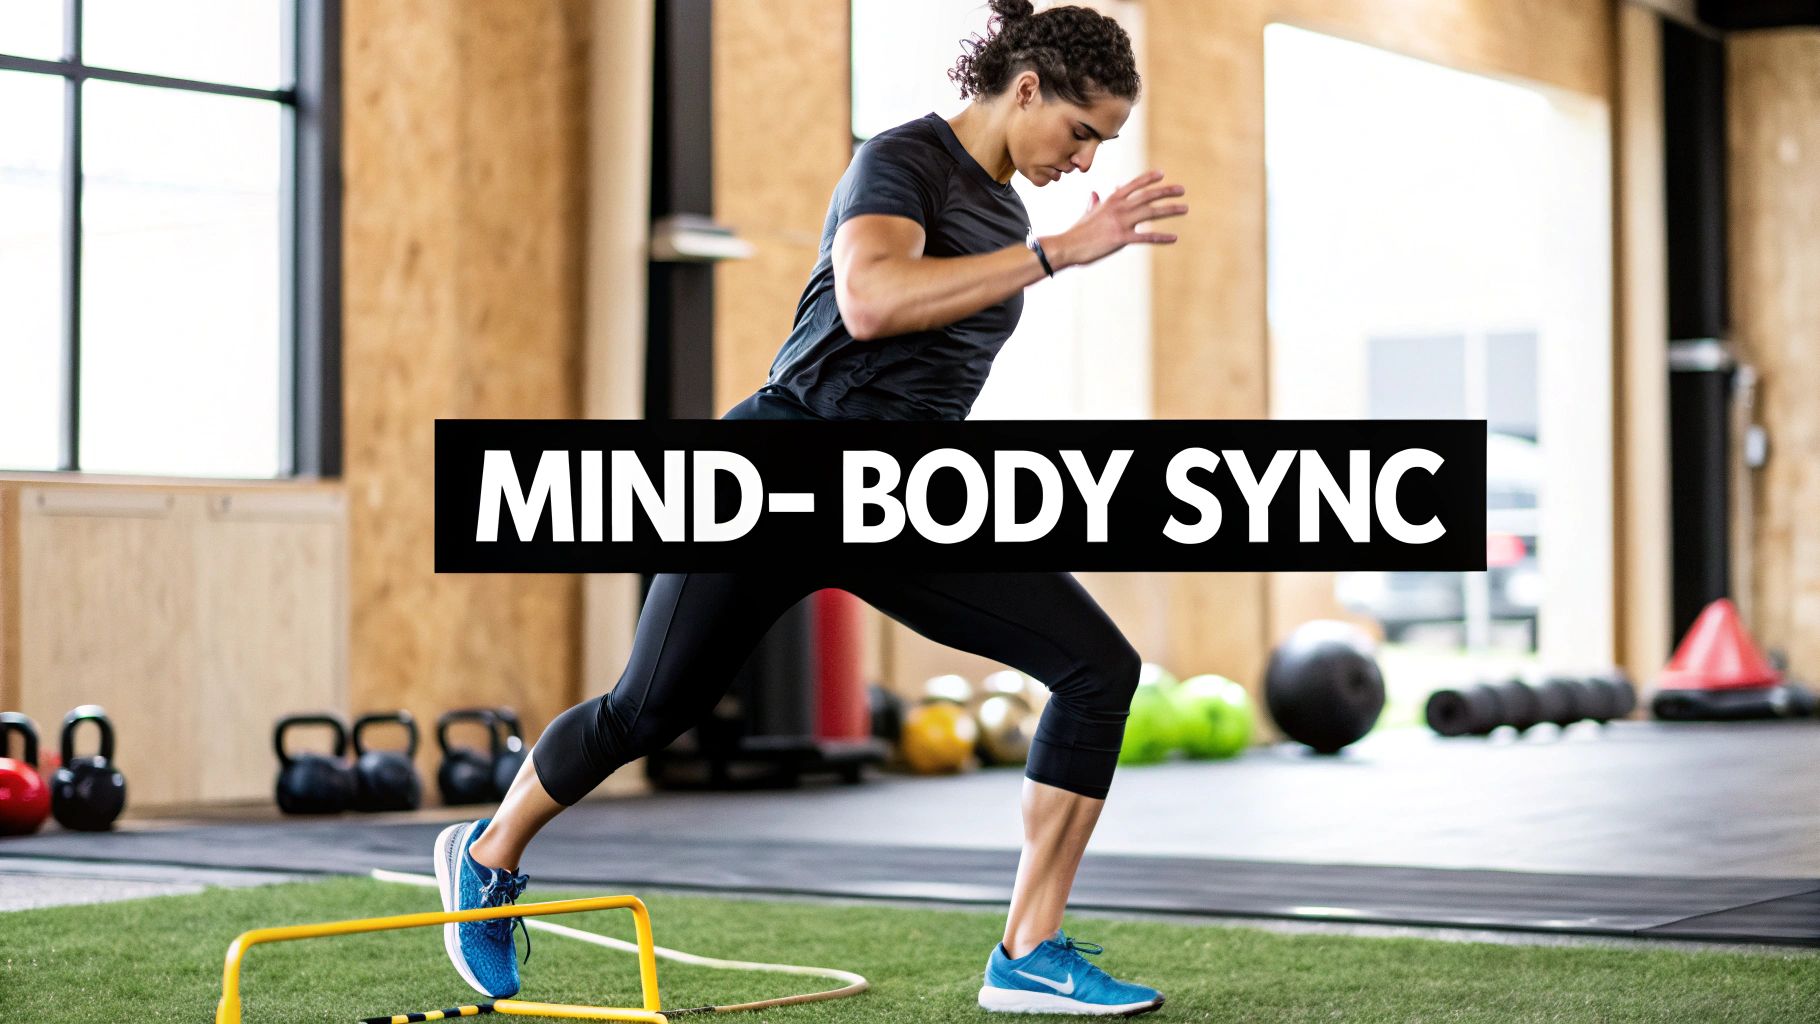
Neuromuscular Training Exercises: 6 Quick Moves for Mind-Body Connection
Ever feel like your body has a mind of its own? One moment you're gliding with grace, the next you’re stumbling over thin air. That frustrating disconnect isn't just a random fluke; it's a communication breakdown in your body's internal wiring. Welcome to the world of neuromuscular training, the science of upgrading the high-speed connection between your brain and your muscles.
Forget mindless reps and a brute-force approach to fitness. We're diving into a smarter way to train, one that teaches your body to be more responsive, coordinated, and incredibly resilient. This isn't just about building bigger muscles; it's about embedding intelligence into every single movement you make. A finely tuned neuromuscular system is the secret weapon behind everything from preventing a clumsy ankle roll on a trail run to executing a complex lift with perfect form. It’s the difference between merely exercising and truly mastering your own body.
This guide is your direct route to that mastery. We've curated a powerful list of eight fundamental neuromuscular training exercises designed to recalibrate your system from the ground up. Each one is a targeted drill to sharpen your balance, enhance your stability, and forge an unbreakable mind-body connection that makes movement feel intuitive and powerful.
Ready to move beyond simple strength and unlock your body’s latent potential? Let’s reboot your system and begin the upgrade. Here are the essential exercises that will transform how you move, feel, and perform.
Think of your nervous system as a super-smart, lightning-fast command center. When you stand on one leg, you're sending it into overdrive, forcing it to constantly send and receive messages to keep you from toppling over. This frantic communication is the heart of single-leg balance, one of the most fundamental yet powerful neuromuscular training exercises out there. It’s not just about brute strength; it's about teaching your brain and muscles to have a better, faster conversation.
This exercise is the cornerstone of yoga's Tree Pose (Vrksasana) and a secret weapon for athletes and physical therapy patients alike. It trains your proprioceptive system, the body's internal GPS, improving its ability to sense its position in space. By challenging your stability, you strengthen the tiny stabilizer muscles around your ankles, knees, and hips, creating a resilient foundation that can help prevent injuries.

Getting started is simple, but the devil is in the details. Follow these steps to build a rock-solid balance.
Key Insight: The magic happens in the micro-adjustments. Feel your ankle wobbling? That's your nervous system learning in real-time. Don't fight it; embrace the wobble as a sign of progress.
Ready to level up? This exercise is incredibly versatile.
This foundational movement is a game-changer for anyone looking to improve coordination, prevent falls, or rehab an injury. To dive deeper into the science and variations of stability work, you can explore these detailed balance improvement exercises.
If single-leg balance is about static control, the dynamic lunge with rotation is its rebellious, globetrotting cousin. This exercise is a full-body symphony of movement, demanding your brain to coordinate stability, mobility, and power all at once. It’s one of the most effective neuromuscular training exercises for real-world scenarios because life rarely happens in a straight line; we twist, reach, and bend. This movement teaches your muscles and nervous system to handle those complex, multi-planar demands gracefully and safely.
Inspired by the fluidity of yoga's Crescent Lunge (Anjaneyasana) and supercharged by functional fitness principles, this exercise is a favorite among dancers, golfers, and physical therapists. It challenges your lower body to maintain a stable lunge while your core and upper body rotate, forging a powerful connection through your kinetic chain. This trains your body to transfer force efficiently from the ground up, crucial for everything from swinging a golf club to catching yourself from a stumble.
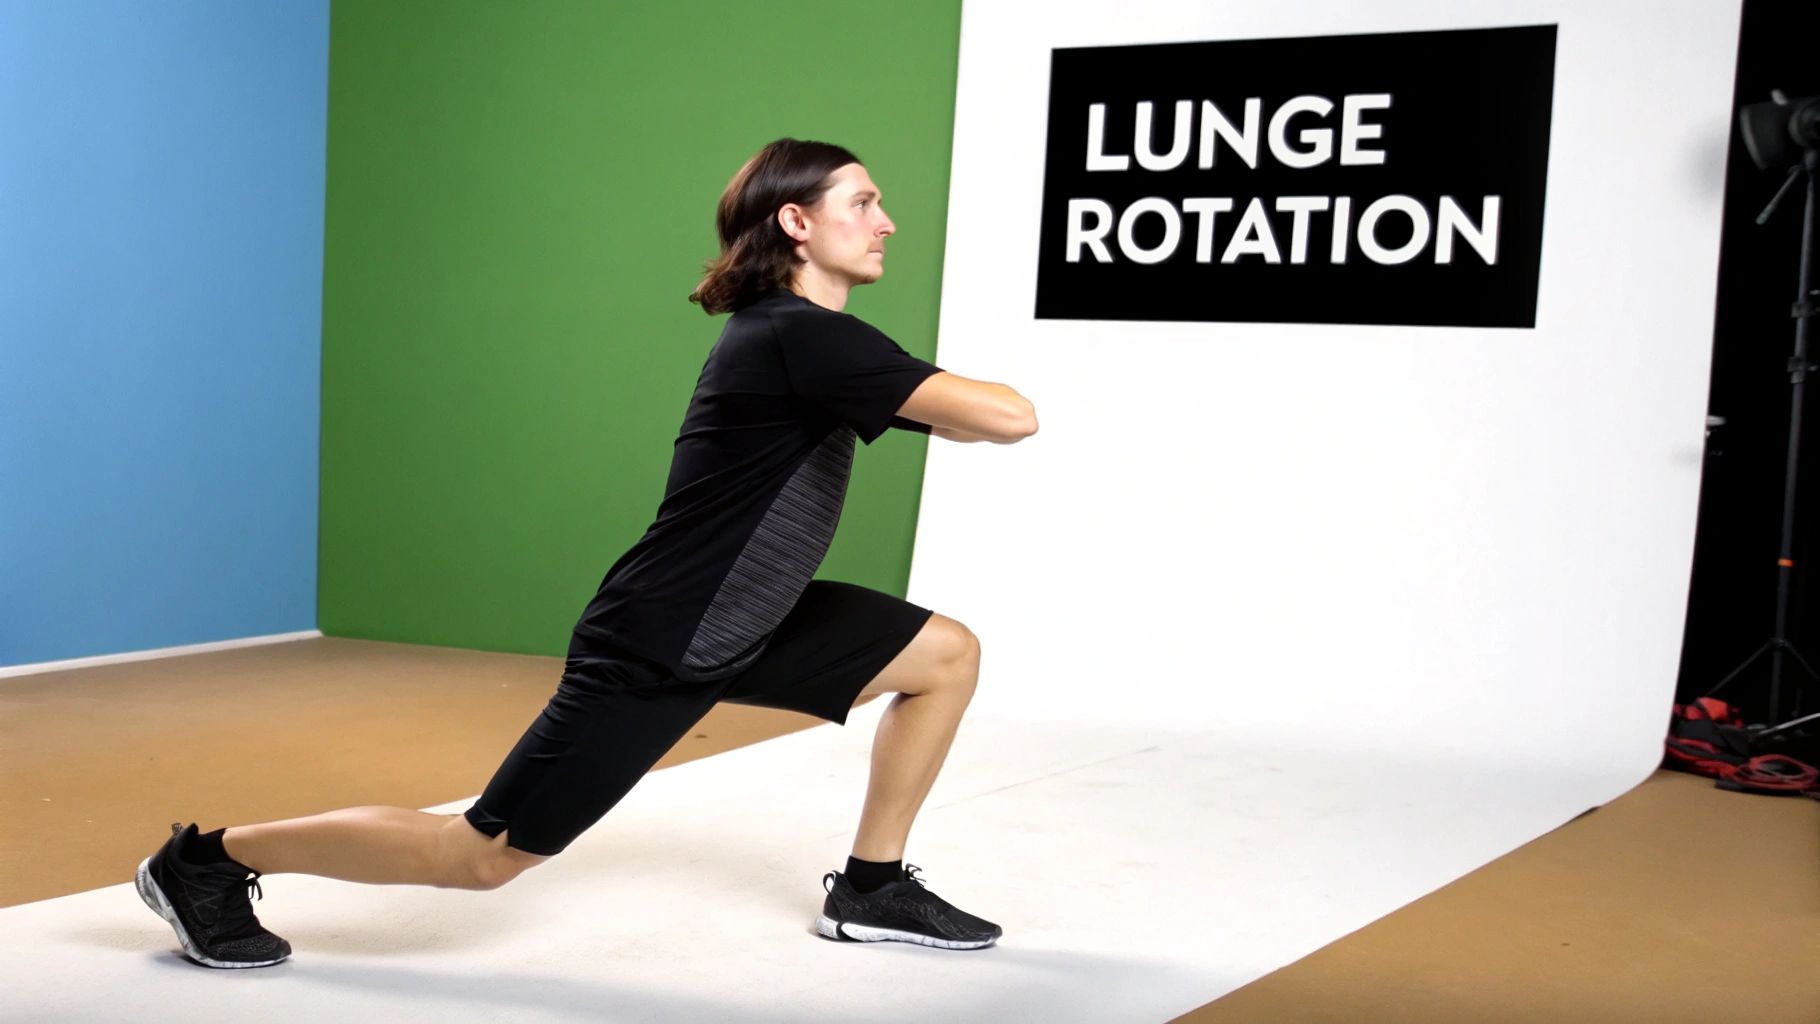
The key is controlled, deliberate movement. Momentum is the enemy here; precision is the goal.
Key Insight: Think of your hips as headlights on a car. As you rotate your torso, keep those headlights pointing straight ahead. This forces your core stabilizers, especially your obliques, to do the work and protects your lower back.
Ready to add more complexity? This movement is easily adaptable.
Imagine trying to pat your head and rub your belly while balancing on a tightrope. That’s the kind of complex coordination your brain tackles during the bird-dog, one of the most deceptive but brilliant neuromuscular training exercises for core stability. It's more than just an ab exercise; it’s a masterclass in teaching your brain to control your core while your limbs move independently, a crucial skill for everything from sprinting to lifting groceries.
This movement is a staple in physical therapy for lower back pain and a cornerstone of smart core training in yoga and Pilates. Its power lies in creating an anti-rotation challenge. As you extend an opposite arm and leg, your core has to fire like crazy to prevent your torso from twisting. This trains the deep stabilizing muscles of your spine to do their most important job: protecting your back from unwanted, potentially injurious movement.
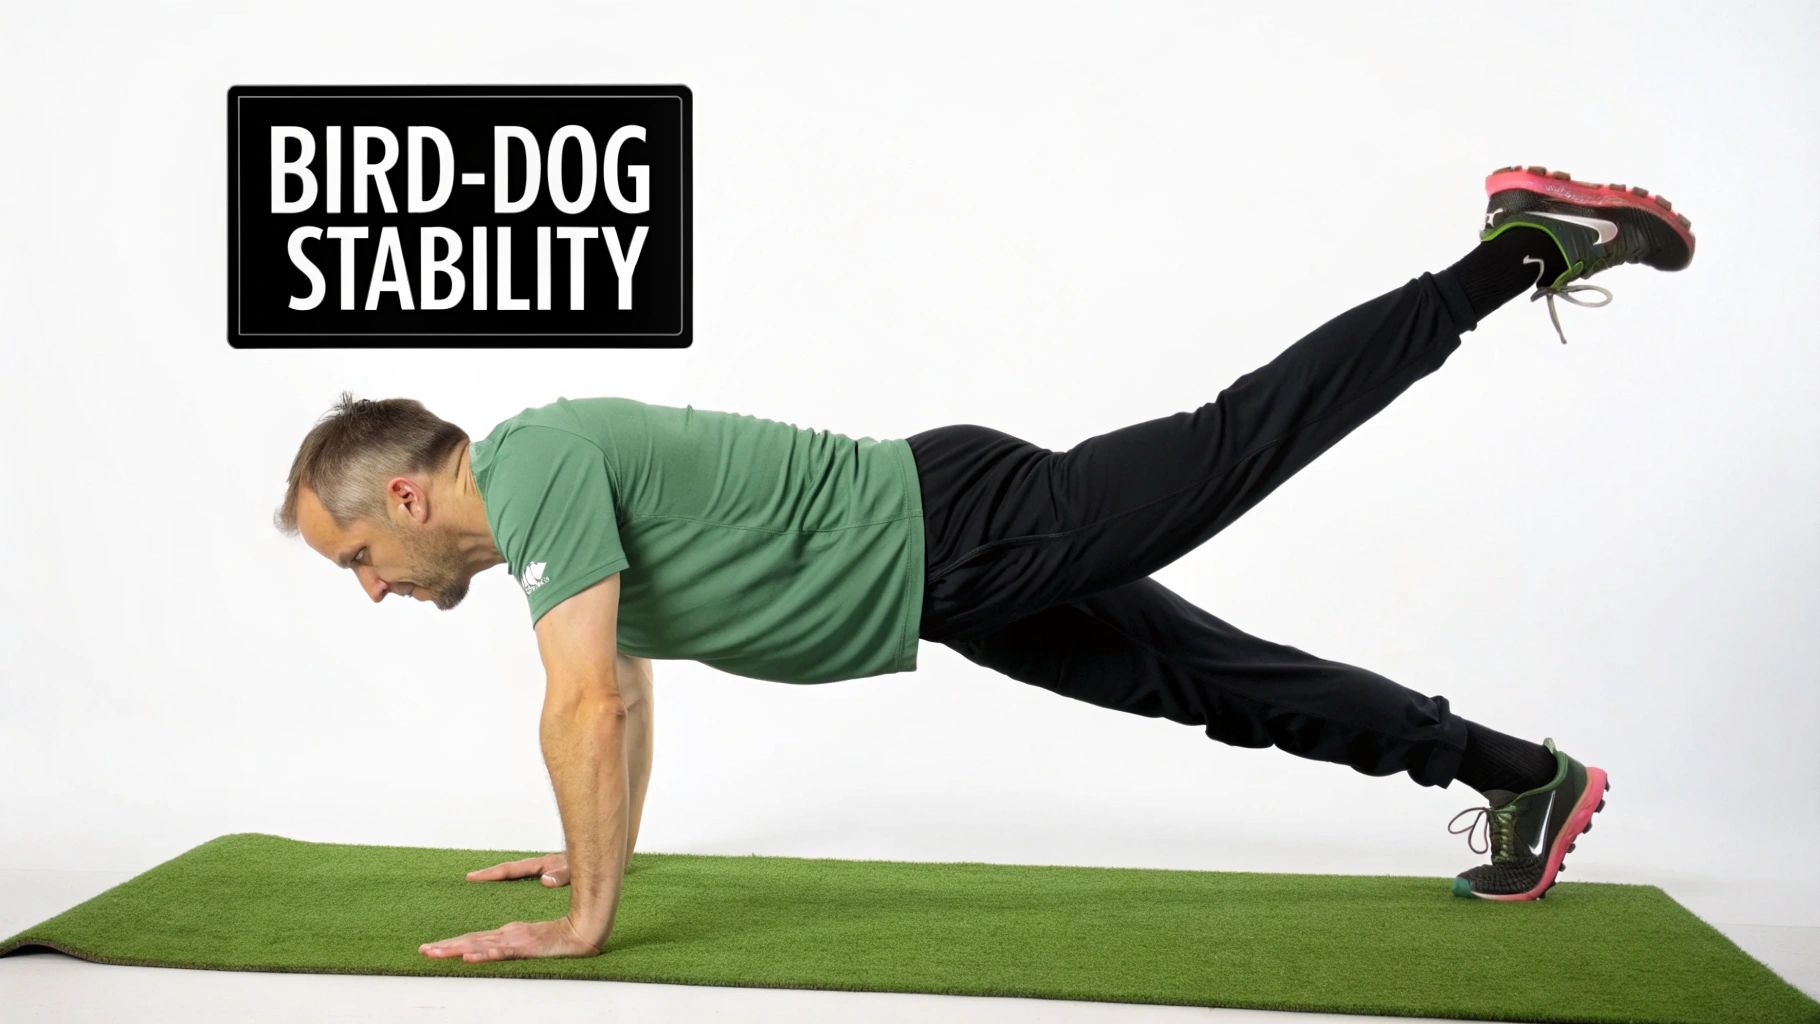
Slow and steady wins the race here. Rushing through this one misses the point entirely.
Key Insight: Don't think about lifting your arm and leg high. Instead, think about reaching them as far away from your body as possible, as if you're being stretched in opposite directions. This cue helps maintain a neutral spine and maximizes core engagement.
Ready to make this core-carving classic even tougher?
This exercise is fundamental for building a truly functional and resilient core. To explore more movements that build this kind of integrated strength, you can discover these foundational yoga poses for core strength.
Imagine trying to balance a seesaw with a feather on one end and a bowling ball on the other, all while standing on one foot. That’s the kind of complex, high-stakes communication the single-leg deadlift demands from your brain and muscles. This isn't just a hamstring exercise; it's a masterclass in coordination, making it one of the most effective neuromuscular training exercises for building functional strength and resilient hips.
This movement is a staple in athletic training for its injury-prevention benefits and a cornerstone of yoga flows (as a dynamic forward fold). It forces your nervous system to manage stability under load while moving through a large range of motion. By combining a hip hinge with a balance challenge, you're training your glutes to fire, your core to stabilize, and your proprioceptive system to work overtime, creating an athlete-grade foundation.
Proper form is non-negotiable here. The goal is a controlled hip hinge, not a sloppy bend at the waist.
Key Insight: Think of your body as a single, straight line from your head to the heel of your extended leg. The movement should pivot from your hip, not your lower back. If you feel your back rounding, you've gone too far.
Ready to make this powerhouse move even more challenging?
This exercise is a true test of neuromuscular efficiency and a powerful tool for building a body that is both strong and smart. To understand more about how this movement sharpens your body's internal senses, explore this guide on what is proprioception training.
Your feet are your body's unsung heroes, packed with a dense network of nerves and tiny muscles that constantly relay information to your brain. Tapping into this network is the goal of ankle articulation, a seemingly simple exercise that is a powerhouse for neuromuscular training. By deliberately moving through plantar flexion (pointing your toes) and dorsiflexion (flexing them up), you are waking up proprioceptors that often go dormant in shoes, boosting the brain-foot connection.
This isn't just about wiggling your ankles; it's a targeted drill to improve how your nervous system perceives and controls this crucial joint. Popularized in physical therapy clinics and by barefoot movement advocates like Katy Bowman, this exercise strengthens the intrinsic foot muscles that support your arch and prevent common injuries like ankle sprains. It’s one of the most effective neuromuscular training exercises for building a resilient foundation from the ground up, impacting everything from your gait to your standing yoga poses.
Isolating these movements is key to retraining your neuromuscular pathways. Start slowly to build awareness before adding complexity.
Key Insight: The quality of the movement is far more important than the speed. Focus on a smooth, controlled motion through the entire range, avoiding any jerky or rushed actions. This precision is what refines the neuromuscular connection.
Ready to challenge your brain-foot connection further? Integrate these progressions into your routine.
This foundational work is essential for anyone involved in sports with cutting movements, those recovering from ankle injuries, or older adults focused on fall prevention. To explore more about foot-specific training, consider the principles of barefoot methodologies detailed in works like Nutritious Movement.
Your shoulders are complex, high-traffic intersections. The scapular push-up is like hiring a dedicated traffic cop, the serratus anterior muscle, to direct movement and prevent pile-ups. This targeted drill teaches your nervous system to stabilize your shoulder blades before your bigger arm muscles jump into action. It’s a subtle but profoundly effective neuromuscular training exercise that builds the foundation for strong, healthy shoulders.
Often overlooked, this exercise is a secret weapon in physical therapy clinics and high-performance training centers. It directly trains the serratus anterior to do its job: keeping your shoulder blades glued to your rib cage. This creates a stable platform for everything from pushing a door open to pressing a heavy barbell overhead. Mastering this connection helps prevent common issues like shoulder impingement and rotator cuff strain, making it essential for yogis, climbers, and anyone who uses their arms.
The movement is small, but the neurological impact is massive. Precision is key.
Key Insight: This isn't a strength exercise; it's a brain exercise. The goal is neuromuscular learning. Focus on the feeling of your shoulder blades gliding across your rib cage, not on how many reps you can crank out.
Ready to build smarter shoulders? Here’s how to integrate this drill.
This foundational drill is a game-changer for anyone looking to build resilient shoulders, improve posture, or progress to advanced movements like handstands. By focusing on this small but mighty muscle, you're rewiring your system for safer, stronger performance.
Your glutes are the powerhouse of your body, but they can get lazy. The Glute Bridge with March is the ultimate wake-up call, transforming a simple bridge into a dynamic stability challenge. This exercise forces your brain to command your glutes and core to work in perfect harmony, preventing your hips from dropping or twisting as you lift each leg. It’s a masterclass in pelvic control and one of the most effective neuromuscular training exercises for building a rock-solid posterior chain.
This movement is a staple in physical therapy for alleviating lower back pain and a secret weapon for athletes seeking explosive hip power. It teaches your body to maintain a neutral spine and stable pelvis even when your limbs are in motion. By isolating one side at a time during the march, you're training the gluteus medius and minimus to fire on all cylinders, which is critical for everything from running mechanics to holding complex yoga poses.
Proper form is everything here to protect your lower back and activate the right muscles. Follow these steps for a perfect bridge and march.
Key Insight: Imagine a glass of water balanced on your pelvis. Your goal is to march without spilling a single drop. This visualization forces your core and glutes to engage to prevent any tilting or dropping.
Ready to build a more resilient core and powerful hips? Here’s how to integrate this exercise.
If your hips are the command center for lower body stability, then the gluteus medius is the unsung hero running the show. The Lateral Band Walk is one of the most effective neuromuscular training exercises designed to wake up this crucial muscle. It’s a deceptively simple movement that forces your brain to fire the right hip muscles at the right time, preventing your knees from collapsing inward (a common culprit behind many injuries).
This exercise isn't just a warm-up staple for elite athletes; it's a powerful rehabilitative and preventative tool for everyone from runners to yogis. By placing a resistance band around your legs, you create constant tension that challenges your hip abductors and external rotators. This directly trains your neuromuscular system to maintain proper knee alignment over your toes, building a resilient foundation that protects you during squats, lunges, and even just walking up stairs.
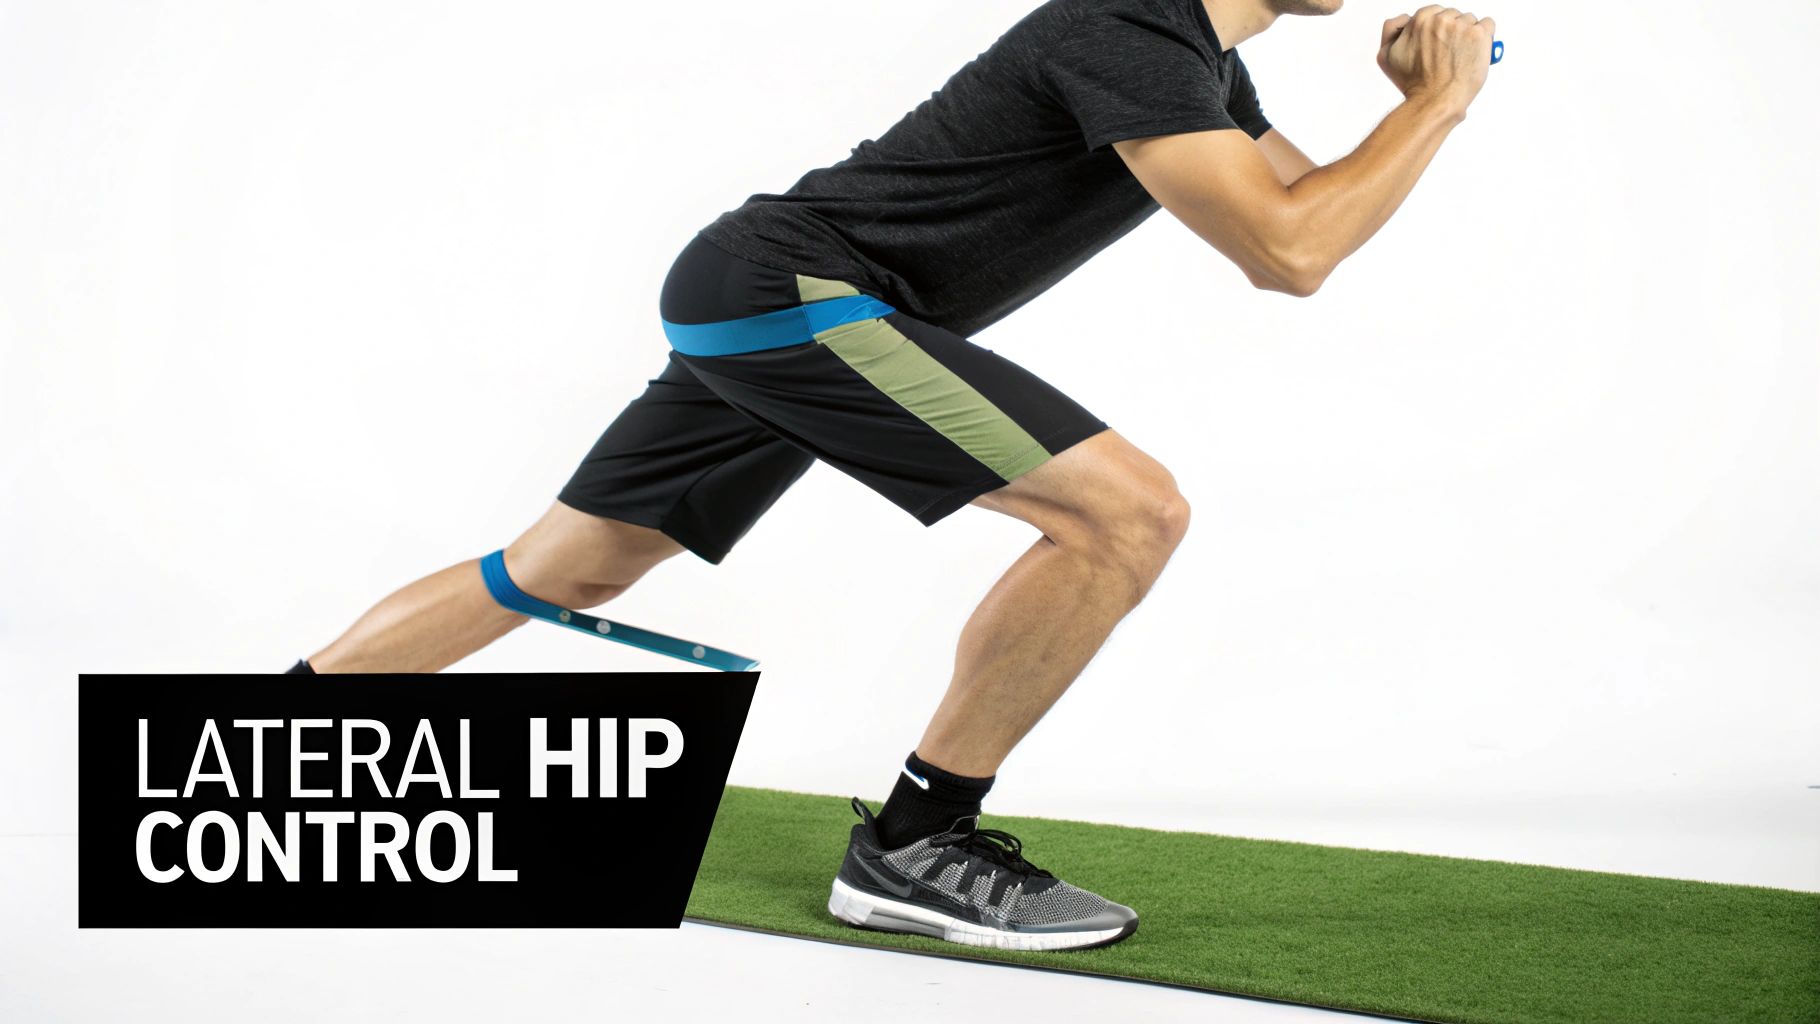
Executing this move with precision is key to activating the right muscles. Slow and controlled wins the race here.
Key Insight: The goal is to feel the burn on the outside of your hips, not your quads. If you're not feeling it, focus on pushing your knees out against the band and taking smaller, more controlled steps.
Integrate this into your routine to build stronger, more stable hips.
This exercise is a non-negotiable for anyone looking to fix knee pain, improve running mechanics, or simply build a more functional and injury-proof lower body.
You’ve just navigated a comprehensive tour of some of the most potent neuromuscular training exercises available. From the foundational stability of the Single-Leg Balance to the dynamic control demanded by the Lateral Band Walk, each exercise is a piece of a larger puzzle: rewiring your body for optimal performance, resilience, and proprioceptive awareness.
We've moved beyond simply "working out" and ventured into the realm of "working in." This is not about brute force or mind-numbing reps; it’s about a mindful, deliberate conversation between your central nervous system and your musculoskeletal system. Think of it as upgrading your body’s internal software.
Remember the first time you tried any new physical skill? Whether it was riding a bike or attempting a new yoga pose, it likely felt awkward and required intense concentration. That’s the "conscious incompetence" stage. You know what you're supposed to do, but your body isn't quite getting the memo.
The exercises in this guide, like the Quadruped Alternating Limb Raise and the Single-Leg Deadlift, are designed to fast-track you through this phase. By focusing on slow, controlled movements, you give your brain the time it needs to map the correct muscle activation patterns. You're consciously telling your glutes to fire, your core to brace, and your ankle to stabilize.
Key Takeaway: Neuromuscular training is the bridge between thinking about a movement and owning it. The goal is to make good form your default setting, not a special occasion.
With consistent practice, you progress to "conscious competence." The movements feel more natural, but they still require your full attention to execute perfectly. This is where the real magic begins to happen. Each successful repetition strengthens the neural pathways, making the connection faster and more efficient. It's like paving a dirt road into a superhighway for nerve signals.
The ultimate destination of this journey is "unconscious competence." This is where the complex coordination required for a Dynamic Lunge with Rotation or a Glute Bridge March becomes second nature. You no longer have to think, "track my knee," "engage my core," or "keep my hips level." Your body just knows. This is the state where athletes seem to move with effortless grace and where your risk of a non-contact injury plummets.
This mastery has profound real-world applications:
The power of neuromuscular training exercises lies in their cumulative effect. You aren't just building stronger muscles; you're building a smarter, more responsive body. You are creating a system that can adapt, react, and perform with precision, whether you're navigating a crowded sidewalk or hitting a new personal record in the gym. Embrace the process, stay consistent, and get ready to unlock a level of physical intelligence you never knew you had.
Ready to accelerate your journey to unconscious competence? The Dalm app uses advanced AI and your phone's camera to provide real-time, precision feedback on your form, acting like a physical therapist in your pocket. Stop guessing if you're doing it right and start building perfect neuromuscular patterns with every single rep by visiting Dalm to learn more.


