
Preventing Yoga Injuries: Safe Poses and Modifications
So, you want to make your yoga practice injury-proof? It all comes down to two things: tuning into what your body is telling you and valuing smart alignment over trying to bend yourself into a pretzel.
Let's get one thing straight: yoga isn't the enemy. But the way we sometimes approach it? That can be a problem. Building a safe, long-lasting practice starts with understanding why things go wrong. It’s rarely the pose itself that’s the villain; it’s usually the small, sneaky mistakes we make over and over again.
Imagine forcing a deep hamstring stretch with a hunched-over back. It might feel like you're getting somewhere, but you're really just asking for trouble with your lower spine. Or think about letting your shoulders become earrings in every Chaturanga—that’s a direct flight to rotator cuff problems. These aren’t big, dramatic blowouts. They're the little habits that slowly wear down your body’s defenses.
The real key to preventing yoga injuries isn't about blacklisting certain poses. It’s about developing a deep, almost sixth sense of body awareness. This is your secret weapon, helping you feel the difference between the good burn of a working muscle and that sharp, "nope, not today!" signal that’s screaming at you to ease up.
While yoga is incredibly safe overall, some body parts tend to take more of a beating if you're not paying attention. The biggest culprits are often a tag team of ego (pushing too hard, too fast) and just not knowing how the body is supposed to move.
Don't just take my word for it. While the risk of a serious yoga injury is super low, the data shows some clear patterns. One study looking at yoga-related injuries from 2001 to 2014 found that the trunk—your back and shoulders—was the hotspot, accounting for a whopping 46.6% of all cases. This really drives home how crucial it is to keep your core fired up and your spine in a happy, neutral position.
The same research also pointed out higher injury rates for yogis aged 65 and up, which is a great reminder that smart modifications are essential at every stage of life. If you're curious, you can explore more insights about these yoga injury trends and what they mean for a safer practice.
To build a practice that feels good for the long haul, you need to know where the common booby traps are hidden.
It helps to have a mental map of the most vulnerable areas. I've seen these issues pop up time and time again with students, and a little awareness goes a long way.
Seeing these patterns laid out makes it easier to spot them in your own practice. Once you know what to look for, you can start making the small adjustments that keep you safe and strong on the mat.
The real goal isn't to perfectly replicate some pose you saw on Instagram. It’s to find the version of the pose that feels perfect for your body, right now. Making that mental switch is the foundation of an injury-free practice.
When you start recognizing these common pitfalls, you turn your mat from a place of potential risk into a true sanctuary for mindful, feel-good movement.
Jumping straight into a fast-paced vinyasa flow without warming up is like trying to drive a car in freezing weather without letting the engine run first. Sure, it might work, but you're risking some serious internal damage. Preventing yoga injuries starts long before you even think about hitting your peak pose. It begins with a thoughtful, dynamic warm-up that gets your body ready for what’s ahead.
Forget those old-school static stretches where you just hang out in a pose for a minute. Your muscles are cold, and they are definitely not ready for that kind of pull. Instead, the real magic happens with gentle, repetitive movements that get your blood flowing, lubricate your joints, and wake up your entire nervous system. Think of it as your pre-flight check for a safe and successful practice.
Think of your warm-up as a gentle conversation with your body, asking it what it needs today. Simple, flowing sequences are perfect for this. They don't just stretch; they actively prepare your muscles for the full range of motion you'll explore later in your session.
Some of the most effective moves are the classics for a reason:
For a more detailed walkthrough, our guide on essential yoga warm-up exercises gives you a complete sequence to get you started.
Now, let's talk about the real MVP of preventing yoga injuries: your core. A strong, engaged core is your body’s natural weightlifting belt. It creates a stable center that protects your lower back and supports literally every single move you make. Without it, you’re leaving your spine dangerously vulnerable.
Engaging your core isn't about sucking in your stomach to create rock-hard abs. It’s a much more subtle, yet powerful, action. A great cue is to gently draw your navel in toward your spine, like you're zipping up a tight pair of pants. This simple act creates an internal corset that stabilizes your entire torso.
The visual below shows how a simple mistake can send a pain signal—that's your body's cue to bring awareness back and correct your form.

This highlights the critical loop of action, feedback, and correction that is absolutely central to a safe yoga practice.
From your very first breath on the mat, that core engagement should be switched on. It’s what keeps you from collapsing in Plank, sagging in Downward Dog, and tweaking your back in twists. A strong core truly is the foundation upon which every other pose is safely built.
A proper warm-up isn't just a formality; it's a statement of respect for your body. It tells your muscles, joints, and nervous system, "I'm getting you ready for what's next, so we can work together safely."
Beyond just warming up muscles and firing up your core, your overall health plays a huge role in your body's resilience. Chronic inflammation can make your tissues more susceptible to strains and can seriously slow down recovery time. This is why maintaining a healthy internal environment is a key part of your injury prevention strategy.
Understanding how to reduce inflammation for better health through diet and lifestyle can make a world of difference in how your body responds to the physical demands of yoga. By combining a mindful warm-up with a big-picture approach to wellness, you create a truly injury-proof foundation for a practice that can last a lifetime.
Let's get one thing straight: good yoga alignment isn't about twisting your body into some picture-perfect geometric shape you saw on Instagram. It’s a much deeper, more personal conversation with your own anatomy. The real goal is to build stability and strength in a way that prevents the kind of joint wear-and-tear that can sideline you for good.
We're going to move beyond vague advice and get into the nitty-gritty of the poses that are most often butchered. Think of this as your hands-on workshop for building a practice from the ground up—one that feels powerful and, most importantly, completely safe.

If there’s one pose that causes more shoulder grief than any other, it’s Chaturanga Dandasana. When you nail it, it’s a beast for building upper body and core strength. But when it's done incorrectly—and it often is—it’s a one-way ticket to rotator cuff city.
The classic mistake? Letting the elbows flare out wide like chicken wings and dropping the shoulders way below the elbows. This puts a ridiculous amount of pressure on the tiny rotator cuff muscles and the front of your shoulder joint. Ouch.
To protect your shoulders and build real strength, try these cues:
And listen, if you can't hold this form, just drop to your knees. A modified Chaturanga on your knees with perfect alignment is a million times better than a sloppy full version that wrecks your body.
Warrior II (Virabhadrasana II) seems simple enough, but it hides a sneaky trap for your front knee. It’s a fantastic hip opener and leg strengthener, but letting that front knee collapse inward puts some seriously sketchy torque on the knee ligaments.
This inward dive, known as knee valgus, is a frequent culprit behind knee pain in yogis. Remember, your knee is a hinge joint. It loves to bend forward and backward, but it absolutely hates twisting side-to-side.
The golden rule for standing poses is simple: your knee should always track toward the center of your foot. In Warrior II, that means aiming your front kneecap toward your second and third toes.
Take a quick peek down. Can you see your big toe on the inside of your knee? If not, your knee has probably caved in. To fix it, actively press your knee toward the pinky-toe side of your foot. You’ll feel your outer hip muscles (hello, gluteus medius!) kick in to stabilize your pelvis and protect that precious knee.
How many times have you seen it? Someone in a forward fold (Uttanasana) desperately reaching for their toes with a back rounded like a turtle shell. This classic error totally misses the hamstring stretch and puts all the strain squarely on the lumbar spine.
A healthy forward fold is all about the hips, not the back. The movement is a hip hinge, pure and simple—like a door swinging on its hinges. Your spine should stay long and neutral as you fold.
Try this:
Forget about touching the floor. It's far better to have your hands on blocks with a flat back than to force the pose with a rounded, vulnerable spine. This movement pattern isn't just for yoga; it's a cornerstone of good posture. For more tips on this, check out these awesome postural awareness exercises that will make a huge difference on your mat.
Triangle Pose (Trikonasana) is all about creating delicious length and space, but locking out the front knee is a risky habit. When you hyperextend your knee, the stress of the pose bypasses the muscles and goes straight into the joint and ligaments, which are not built for that kind of load.
The secret to a safe Triangle Pose is all about stacking your joints and keeping a tiny micro-bend in that front knee.
When you nail your alignment, yoga transforms from a potential source of strain into a practice that can sustain you for life. By breaking down these key poses and applying mindful cues, you'll build the body intelligence you need to flow with strength and grace for years to come.
Let's get one thing straight right now: props aren't a crutch. They aren't "yoga training wheels." In reality, they're the secret weapon of smart, experienced yogis who’ve learned to leave their ego at the door and prioritize a safe, sustainable practice.
Think of blocks, straps, and bolsters as your personal training partners on the mat. They are essential tools for preventing yoga injuries and, frankly, for getting more out of every single pose.
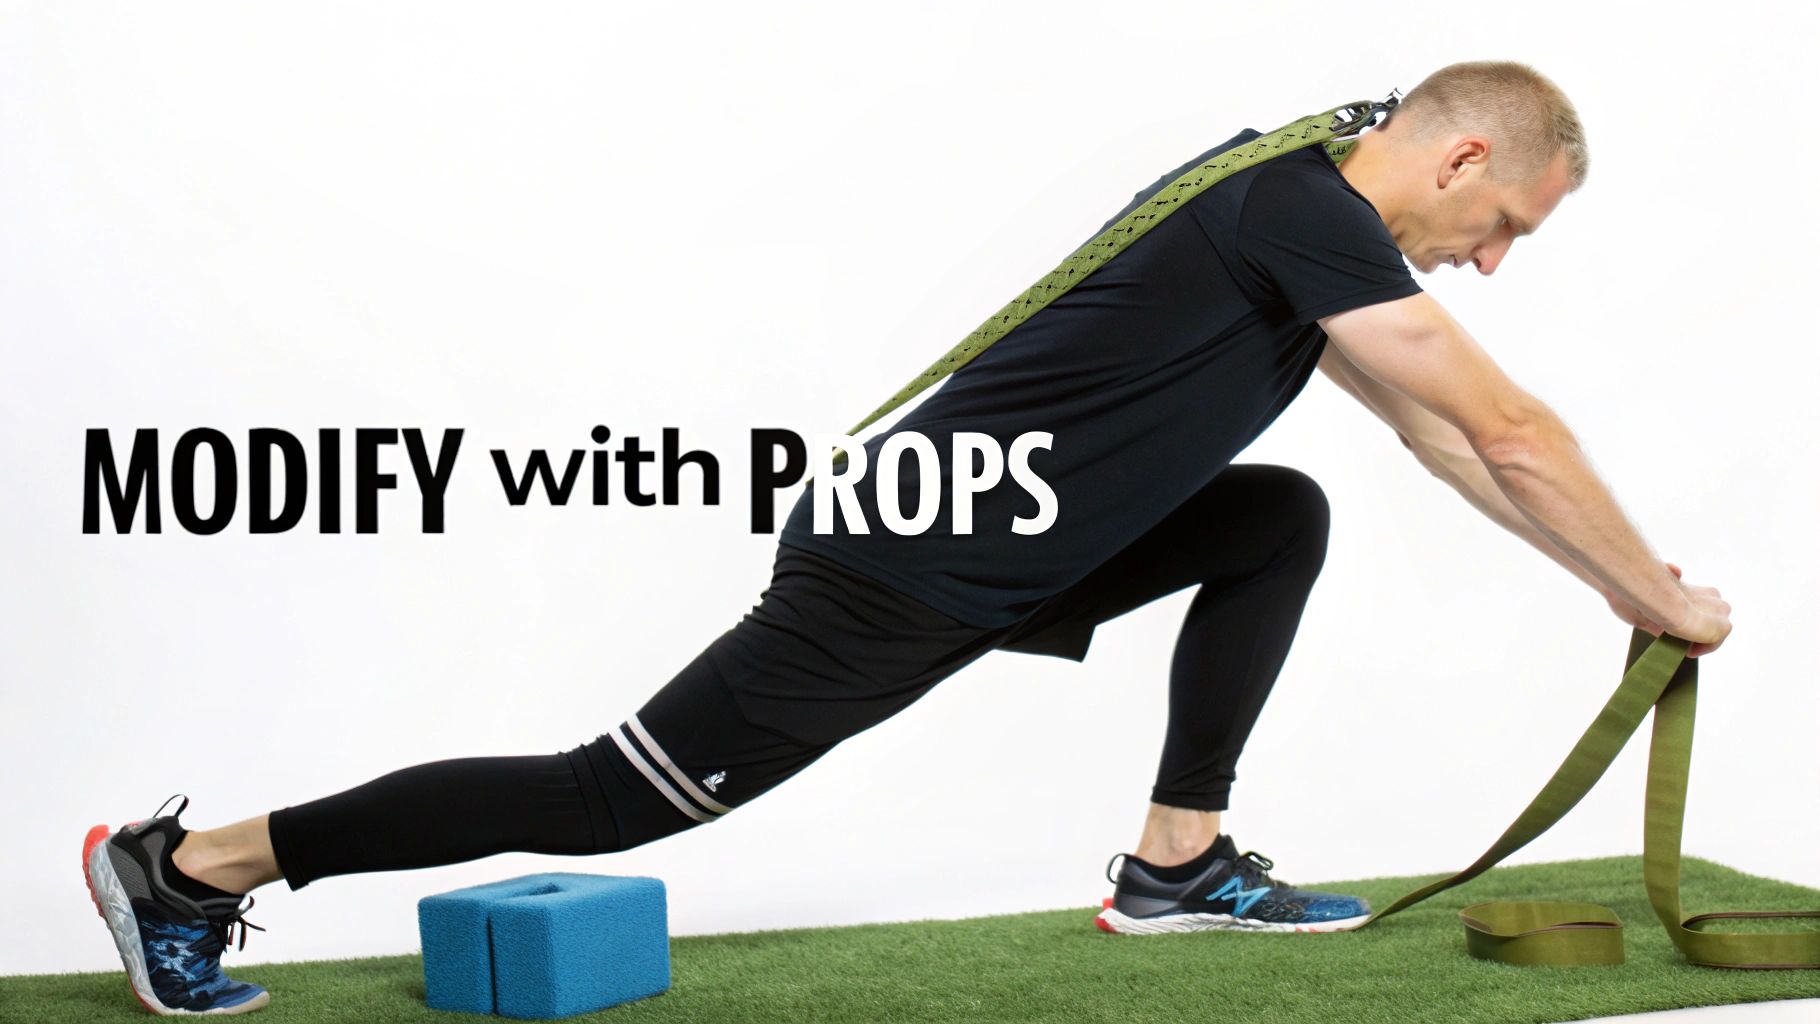
Picture this: you’re in a low lunge or Triangle Pose, straining to touch the floor. What happens? Your shoulders round, your spine twists into a weird C-shape, and you can barely breathe. It’s a recipe for disaster.
Now, slide a block under your hand. Suddenly, the floor comes up to meet you. Your spine can lengthen, your chest opens up, and you can actually breathe deeply into the stretch. You’re getting all the benefits without compromising the integrity of the pose. That’s not cheating; it's just working intelligently with your own body.
The real art of modification is learning how to adapt any pose to fit what your body needs on any given day. This means kicking the idea of a "perfect" pose to the curb and embracing the version that feels nourishing, not punishing.
Here are a few of my favorite game-changing ways to use props:
The most advanced yogi in the room isn't the one tied up in the deepest pretzel. It's the one who is listening most closely to their body and making the wisest choices for a safe, lifelong practice.
This mental shift is everything when it comes to preventing injuries. You’re moving from a place of "I should be able to do this" to a place of "what feels right for me, right now?"
While props are fantastic, your best tool for modification is your own internal awareness. It’s all about learning to tune into the subtle signals your body sends long before pain starts yelling at you.
Your ego might be whispering, "Go on, just a little deeper," while your body is screaming "BACK OFF!" through shallow breath, a clenched jaw, or shaky muscles.
Learning to decode these signals is your most powerful skill. Is that a satisfying stretch, or is it a sharp, pinching sensation? Are your muscles working hard, or are they trembling on the verge of giving out?
This internal dialogue is where the real yoga happens. It's where you find the power to choose a modification not because you’re weak, but because you are strong enough to honor your body's limits. For example, if you feel a sharp twinge in your front knee during Pigeon Pose, that's a non-negotiable signal to ease up. You might prop your hip on a block or switch to a reclined figure-four stretch. That simple choice just saved your joints from a world of hurt.
By embracing props and listening to your body, you’re not taking the easy way out. You're taking the smart way—building a resilient, intelligent practice that will support you for years to come.
Let's be honest. Your most powerful tool for staying safe in yoga isn't a fancy mat or a pricey pair of leggings—it's the three pounds of grey matter between your ears.
When your mind is off replaying a work email for the tenth time, your body is on autopilot. That’s a recipe for sloppy movement, missed signals, and, you guessed it, injury.
When your mind wanders, your alignment often follows. You might forget to engage your core in Plank, let a knee drift into a funky angle in Warrior, or push just a little too far into a stretch because you’re not really there. This is where mindfulness comes in, turning your practice from a simple workout into a moving meditation.
Mindfulness in yoga isn't some woo-woo concept reserved for monks on a mountaintop. It's simply the act of paying attention to what's happening right now, without judgment.
It’s about actually feeling the glorious stretch in your hamstrings during Downward Dog instead of mentally building your grocery list. This razor-sharp awareness is your body's built-in safety system.
Don't just take my word for it. The link between a focused mind and a resilient body is backed by some pretty solid science. A fascinating study on military trainees—people under incredible physical stress—found that those who received mindfulness and yoga training were 18.4% less likely to need a doctor for an injury. That's a huge deal, and it proves how a present mind protects the body.
This switch from mindless reps to mindful action is a game-changer. You start catching the subtle cues you’d otherwise miss: the first hint of strain in your lower back, the tiny tremor in your arms screaming "I'm tired!" Catching these signals early lets you back off before a minor tweak becomes a major problem.
Mindfulness is the practice of noticing the difference between the discomfort of growth and the sharp signal of pain. One builds strength; the other causes damage. Your brain is the only thing that can tell them apart.
So, how do you actually do it? Cultivating this mental focus doesn't mean you need to sit in silent meditation for an hour before every class. You can build this injury-proofing skill right on your mat. It all starts with giving your attention a job.
Here are a few ways I coach my students to stay locked in:
If you really want to deepen your focus and bring a sense of calm, try incorporating a candle yoga relaxation technique into your home practice. The soft, flickering flame can be an incredible visual anchor to quiet a busy mind.
This focused state doesn't just make you a "better" yogi; it makes you a profoundly safer one.
Of course! Here is the rewritten section with a more natural, human-written tone.
Look, no matter how carefully you practice, questions are bound to bubble up. It's totally normal! Let's dive into some of the most common things people wonder about so you can get back on your mat with more confidence and a lot less worry.
Ah, the million-dollar question. The honest answer? It's complicated. You have to learn to be a bit of a detective and listen to what your body is trying to tell you. There's a huge difference between the "good" kind of discomfort and the "bad" kind of pain.
That feeling of a deep stretch in your hamstrings or the gentle burn in your thighs during Chair Pose? That's your body working, adapting, and growing stronger. But if you feel anything sharp, pinching, or tingly—that’s not a challenge, it's a warning sign. Think of it as your body's fire alarm going off.
The old-school mantra of "no pain, no gain" is a one-way ticket to injury in yoga. The goal is to challenge yourself, not punish yourself. Learning to tell the difference between the ache of progress and the alarm bells of pain is the single most important skill you can develop.
While you can tweak just about anything, a few usual suspects pop up time and time again: the lower back, shoulders, and wrists. These areas are the unsung heroes of most yoga classes, and they really feel it when our alignment gets sloppy.
It's simple: check in with your breath. Your breath is the most honest teacher you'll ever have. It doesn't care what the person on the mat next to you is doing or how deep you think you should be in a pose.
If you're holding your breath, clenching your jaw, or your breathing gets choppy and panicked, you've gone too far. That's your nervous system screaming, "Abort mission!" A sustainable, healthy practice is one where you can maintain a steady, even breath, even when things get tough. The second you lose that rhythm, it's time to back off.
Yes, absolutely—but you have to be smart about it. This isn't something to guess about. First things first, chat with your doctor or physical therapist. They’re the only ones who can give you the green light and tell you exactly which movements to avoid.
Once you’ve got clearance, communication is everything. Show up to class a little early and have a quick, quiet word with the instructor about your injury. A good teacher will happily give you modifications to keep you safe. From there, your job is to listen—really listen—to your body and skip anything that doesn't feel right. Focus on what feels good and nourishing, not on what you think you "should" be doing.
Tired of guessing if you're doing it right? Dalm uses AI to give you real-time feedback on your alignment, like having a personal yoga coach in your living room. You can finally perfect your form, dodge injuries, and practice with total confidence. Discover how Dalm can guide your yoga journey today.


