It starts with a dull ache between your shoulder blades, a familiar throb that soon escalates into constant, nagging tension. Welcome to the club nobody wants to join: the Upper Back Pain Club, whose unofficial sponsor is every screen you’ve ever hunched over. The good news? Your membership is fully revocable, and you can cancel it starting today.
This isn't just another list of generic stretches; it's your practical, no-nonsense escape plan. We're diving deep into seven specific yoga poses for upper back pain that precisely target the knotted muscles screaming for relief in your rhomboids, traps, and lats. Forget vague advice. You'll get step-by-step instructions, common mistakes to avoid, and smart modifications tailored to your body's needs.
We’ll even show you how to build these poses into quick, effective sequences and how to use smart tech like Dalm’s AI pose analysis to refine your form for maximum benefit. Get ready to un-slouch, de-stress, and transform that tense, achy upper back into a source of strength and newfound mobility. Let's get moving.
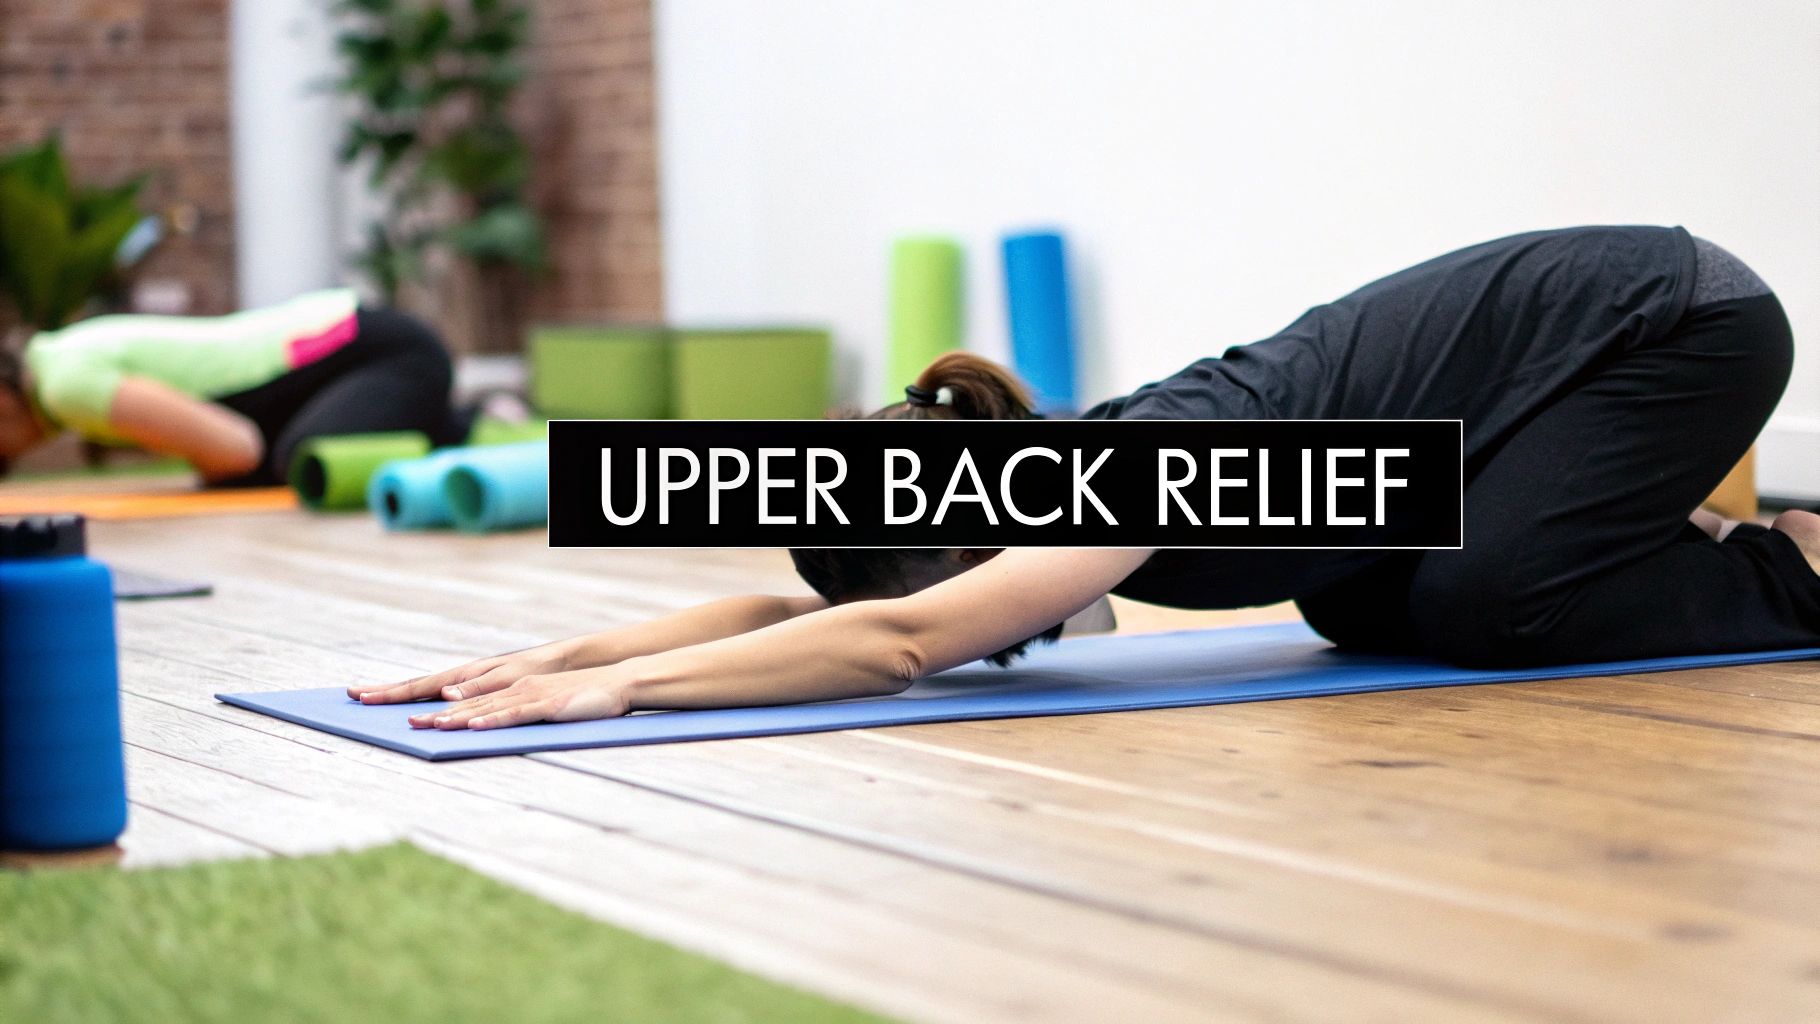
1. Child's Pose (Balasana)
Don't let the name fool you; Child's Pose is a powerhouse for adults, especially those battling upper back pain. Think of it as the ultimate "reset" button for your spine. This gentle resting posture is more than just a break between more intense poses; it's a dedicated stretch for the muscles surrounding your spine, shoulders, and neck. By folding forward, you create space between your vertebrae, allowing tension to melt away from your trapezius and rhomboid muscles, which are often the main culprits behind that nagging upper back ache.
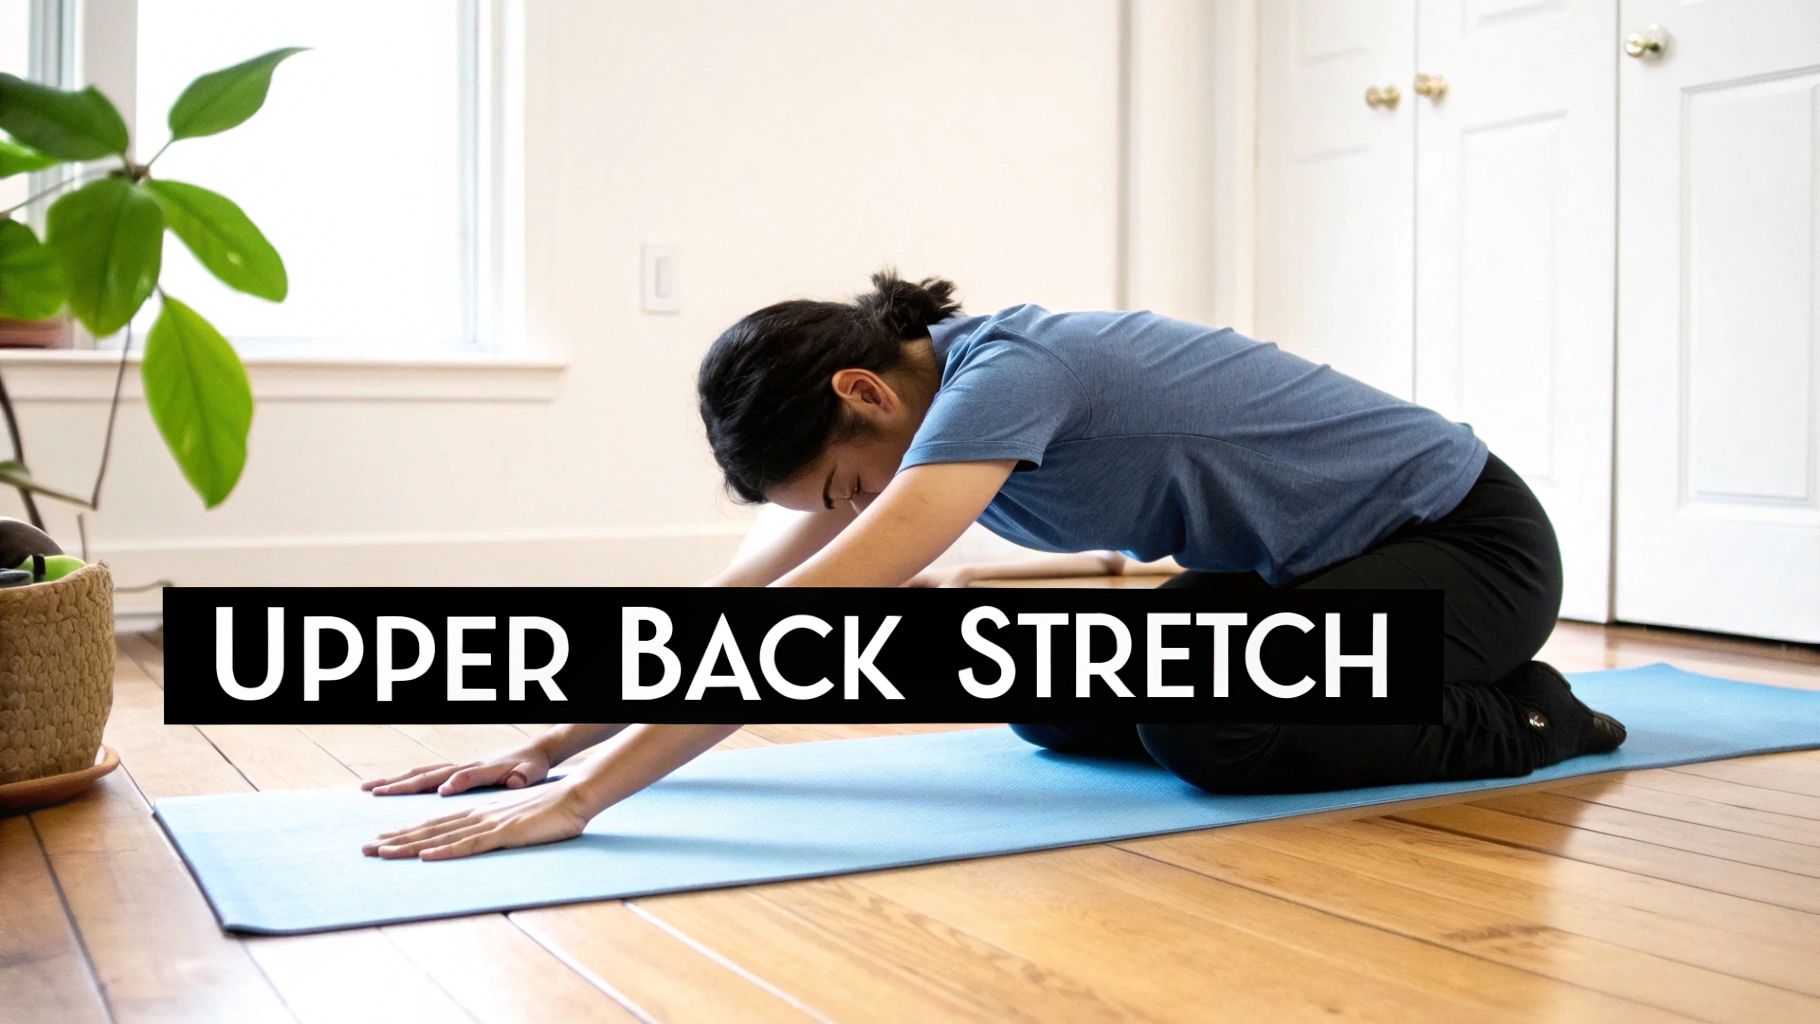
This pose is one of the most accessible and effective yoga poses for upper back pain because it encourages passive stretching. You aren't forcing anything; you're simply letting gravity do the work to gently lengthen and decompress your back.
How to Master Child's Pose
- Get into Position: Start on your hands and knees. Bring your big toes to touch and spread your knees as wide as your yoga mat, or a comfortable distance apart.
- Fold Forward: Exhale and slowly lower your torso between your thighs. Rest your forehead on the mat.
- Extend and Relax: Stretch your arms out in front of you with your palms facing down, or rest them alongside your body with palms facing up. Let your shoulders completely relax and soften.
- Breathe: Take deep, conscious breaths into your upper back. Imagine your breath creating more space and releasing tightness with every exhale. Hold for at least 30 seconds, or up to 5 minutes for a more restorative effect.
Pro-Tips for Maximum Relief
- Support is Key: If your hips don't reach your heels, place a folded blanket or a bolster between your thighs and calves for added comfort.
- Arm Modifications: Feeling a pinch in your shoulders? Place a yoga block under each forearm or hand to reduce the strain.
- Track Your Form: Consistent form is crucial for seeing results. Using a tool like Dalm's AI pose analysis can help you monitor your alignment over time, ensuring you're getting the maximum benefit and avoiding strain as your flexibility improves.
As one of the foundational poses, it's a perfect entry point for anyone new to yoga. You can find more beginner-friendly postures in our guide to gentle yoga for beginners.
2. Cat-Cow Pose (Marjaryasana-Bitilasana)
If your upper back feels more like a block of concrete than a flexible spine, Cat-Cow is your go-to mobilizer. This isn't just one pose but a dynamic, flowing sequence that acts like a massage for your vertebrae. It gently awakens the spine, improves posture, and specifically targets the tension that accumulates in the thoracic spine (your upper and mid-back) and between the shoulder blades. By moving between spinal flexion (Cat) and extension (Cow), you increase circulation and relieve stiffness right where you need it most.
This sequence is one of the most celebrated yoga poses for upper back pain because it actively warms up and lubricates the spine. It’s the perfect way to start a yoga practice or simply to undo the damage of sitting hunched over a desk all day.
How to Master Cat-Cow Pose
- Get into Position: Start on all fours in a tabletop position. Your wrists should be directly under your shoulders, and your knees directly under your hips.
- Inhale into Cow: As you inhale, drop your belly towards the mat. Lift your chest and chin, and gaze gently upward, arching your back. Broaden across your shoulder blades.
- Exhale into Cat: As you exhale, press into your hands and round your spine toward the ceiling, like a stretching cat. Tuck your chin to your chest and release your neck.
- Flow with Breath: Continue flowing between Cow on the inhales and Cat on the exhales. Perform 8-12 rounds, moving slowly and deliberately with your breath to warm up the entire spine.
Pro-Tips for Maximum Relief
- Protect Your Wrists: If you feel discomfort in your wrists, place a folded towel or blanket under the heels of your hands for extra cushioning.
- Full Range of Motion: The real magic happens when you move through your spine's full potential. Use a tool like Dalm's AI pose detection to get real-time feedback, ensuring you're not just moving your neck but articulating each vertebra for maximum benefit.
- Mindful Movement: Close your eyes and focus on the sensation of each vertebra moving. This mindfulness enhances the tension-releasing effects of the pose.
Cat-Cow is a foundational movement that pairs perfectly with other poses. Try flowing into it directly from Child's Pose to create a simple, effective sequence to combat back pain.
3. Downward-Facing Dog (Adho Mukha Svanasana)
Often hailed as the quintessential yoga pose, Downward-Facing Dog is far more than just a transition. This iconic inverted 'V' shape is a full-body experience that works wonders for the upper back. It simultaneously strengthens the arms and shoulders while lengthening the entire spine, creating crucial space between the vertebrae. This action directly targets and relieves tension in the trapezius and latissimus dorsi muscles, areas that frequently store stress from poor posture and long hours at a desk.
The pose encourages the shoulder blades to draw down and away from the ears, counteracting the hunching that contributes to upper back pain. It’s one of the most effective yoga poses for upper back pain because it builds strength and flexibility at the same time, offering both immediate relief and long-term postural improvement.
How to Master Downward-Facing Dog
- Get into Position: Start on your hands and knees in a tabletop position, with your wrists under your shoulders and your knees under your hips.
- Lift Off: Tuck your toes, press firmly into your palms, and lift your hips up and back, forming an inverted 'V' shape with your body.
- Align and Engage: Spread your fingers wide and press through your entire hand. Keep your head between your upper arms, looking toward your thighs. Actively press your chest toward your thighs to deepen the stretch in your shoulders and upper back.
- Breathe: Hold the pose for 5-10 deep breaths. Focus on sending your breath into the space between your shoulder blades, feeling the area expand with each inhale and soften with each exhale.
Pro-Tips for Maximum Relief
- Protect Your Wrists: Distribute your weight evenly across your palms and fingers, pressing down especially through the base of your index finger and thumb to prevent wrist strain.
- Bend Your Knees: Don't worry about getting your heels to the floor. Bending your knees generously allows you to focus on lengthening your spine, which is the primary goal for upper back relief.
- Track Your Form: Proper shoulder alignment is key. Dalm's real-time voice feedback can guide you, ensuring your shoulders are correctly positioned over your wrists and externally rotated to maximize upper back engagement and prevent injury.
4. Reverse Prayer Pose (Pashchima Namaskarasana)
If your upper back pain stems from hours spent hunched over a desk, Reverse Prayer Pose is your secret weapon. This pose is the ultimate antidote to the "tech neck" slump that tightens chest muscles and strains your upper back. It directly counteracts that forward slouch by opening up the chest and collarbones, encouraging your shoulder blades to retract and reset. By doing so, it provides a much-needed stretch for the anterior deltoids and pectorals, allowing the overworked muscles in your upper back, like the rhomboids, to finally relax.

This powerful chest-opener is one of the most effective yoga poses for upper back pain because it addresses the root cause of postural strain. It doesn't just stretch the back; it realigns the entire shoulder girdle, creating better posture habits that last long after you’ve left the mat.
How to Master Reverse Prayer Pose
- Find Your Seat: Begin in a comfortable seated or standing position with a tall, straight spine. Let your shoulders relax down and away from your ears.
- Position Your Arms: Bring your hands behind your back. Start by pressing the backs of your hands together or simply grabbing opposite elbows if your shoulders are tight.
- Form the Prayer: If accessible, flip your hands to bring the palms to touch in a prayer position at the center of your back, with your fingertips pointing upwards towards your head.
- Engage and Hold: Gently press your palms together and draw your elbows back, lifting your chest. Breathe deeply into your chest and upper back, holding for 30-60 seconds. To release, slowly unclasp your hands and let them rest.
Pro-Tips for Maximum Relief
- Start Simple: Can't quite get the full prayer? Don't force it. Begin by grabbing opposite wrists or forearms behind your back to gently open the shoulders.
- Keep Your Chest Open: Avoid rounding your back to get your hands together. The primary goal is to open the chest, so maintain a proud, lifted sternum throughout the pose.
- Track Your Symmetry: It's common to have one shoulder tighter than the other. Using a tool like Dalm's AI pose analysis can provide feedback on your shoulder alignment and ensure you're applying equal pressure with both hands, preventing imbalance.
This pose pairs beautifully with Cat-Cow Pose, as it offers a deep counter-stretch to the rounding motion of Cat. You can explore more combinations in our guide to creating your own yoga flow.
5. Cow Face Pose (Gomukhasana)
Get ready for a deep, satisfying stretch that targets the very heart of upper back tension. Cow Face Pose is a game-changer for tight shoulders, tense rhomboids, and the nagging ache that comes from hours spent hunched over a desk. This seated posture involves a unique arm bind behind the back that simultaneously opens the chest and stretches the deltoids, triceps, and the often-neglected muscles of the upper back.
This pose is one of the most effective yoga poses for upper back pain because it addresses the postural imbalances that cause discomfort. By pulling the shoulders back and down and creating an external rotation in one shoulder and an internal rotation in the other, you're actively counteracting the forward slump that defines modern life. It's an intense, focused release that leaves you feeling taller and more open.
How to Master Cow Face Pose
- Get into Position: Start in a comfortable seated position with your spine tall. You can sit on a block or blanket to elevate your hips. Extend your right arm straight up toward the ceiling.
- Bind the Arms: Bend your right elbow and let your right hand drop down behind your head, palm facing your back. Reach your left arm out to the side, internally rotate it so your thumb points down, and then bend the elbow to bring the back of your left hand up your spine.
- Clasp and Hold: Clasp the fingers of both hands if you can. If not, don't force it. Keep your spine long and your chest open, avoiding the urge to round forward.
- Breathe: Direct your breath into the areas of tension, particularly the shoulders and upper back. Hold for 30-60 seconds, then gently release and repeat on the other side.
Pro-Tips for Maximum Relief
- Strap In: If your hands don't meet, grab a yoga strap, towel, or belt. Hold it with your top hand and grab onto it with your bottom hand, walking your hands closer together over time.
- Keep it Straight: Focus on keeping your spine upright. Resist the temptation to jut your head forward or collapse your chest to make the bind happen.
- Check Your Symmetry: It's common to have one side tighter than the other. Dalm's AI pose analysis can be invaluable here, helping you ensure you're stretching both shoulders with equal engagement and preventing imbalances.
This pose is a powerful tool for improving posture. You can build on its benefits by exploring other postural awareness exercises to reinforce healthy alignment throughout your day.
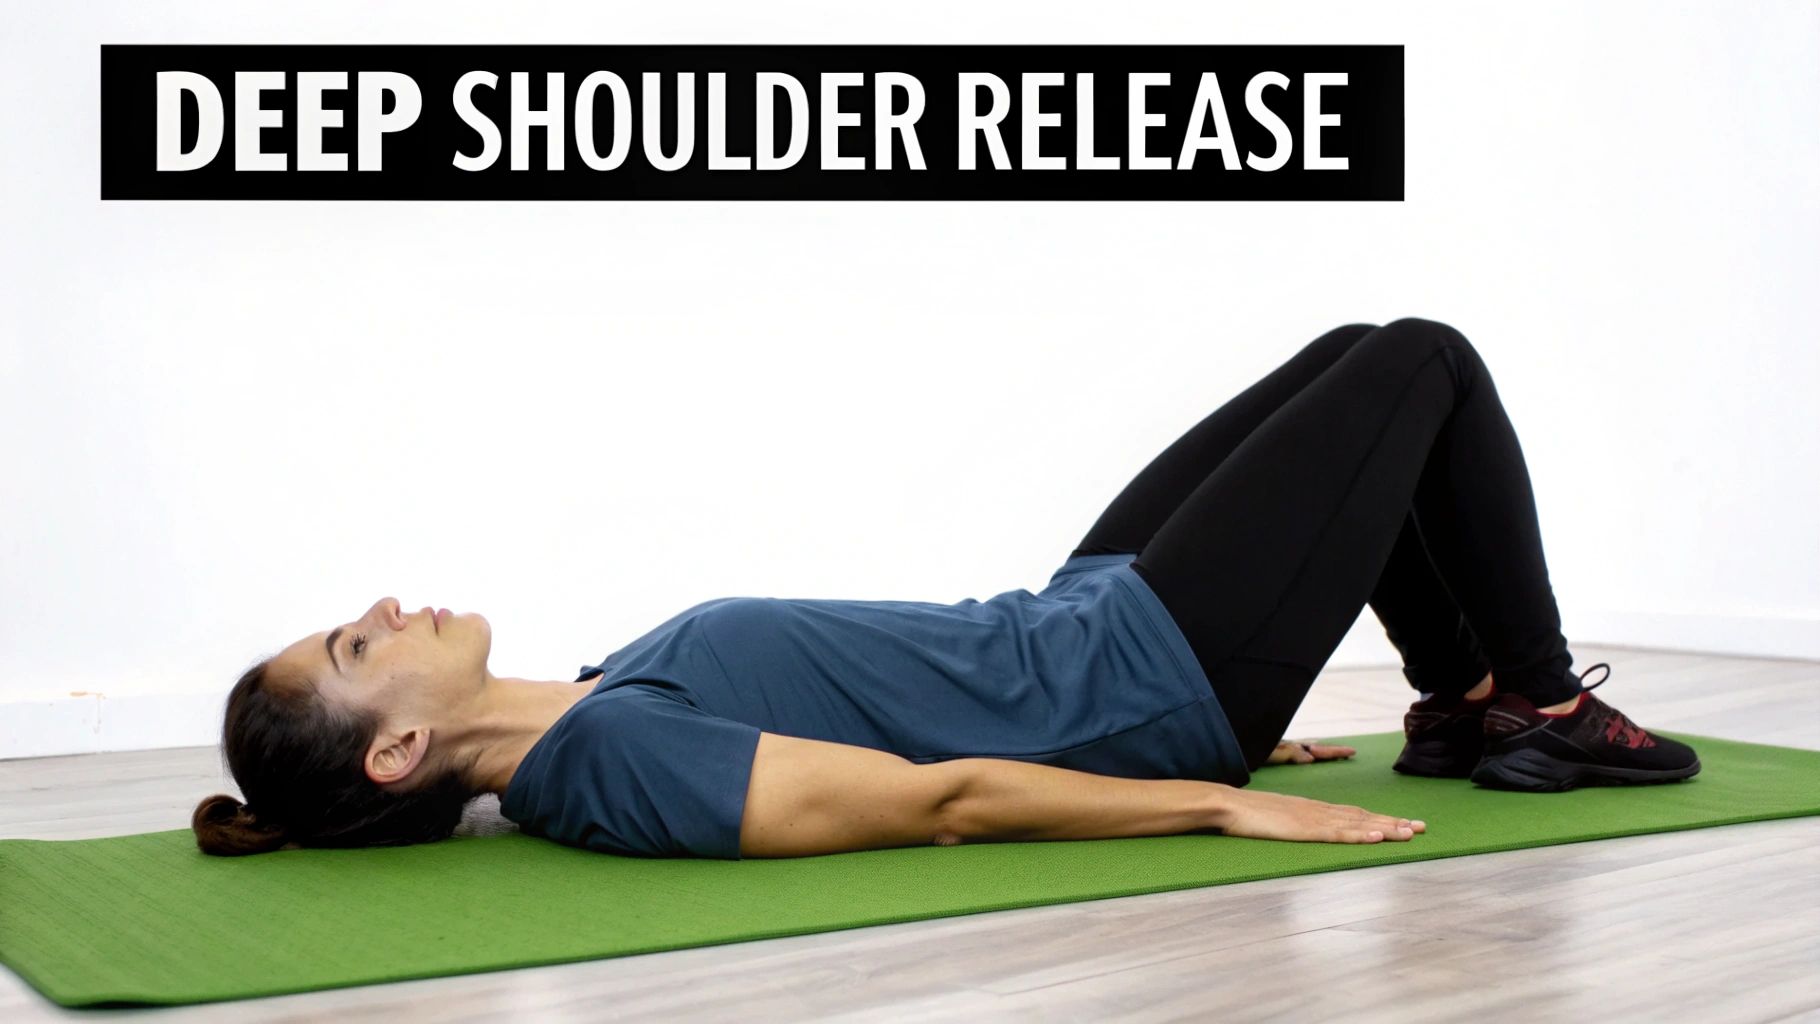
6. Sphinx Pose (Salamba Bhujangasana)
Channel your inner ancient Egyptian monument with Sphinx Pose, a gentle backbend that offers serious relief for a modern problem: the desk-induced slouch. Unlike passive stretches, this pose actively strengthens the muscles of your upper back while opening up your chest and shoulders. It’s a fantastic counter-pose to the forward-hunching posture that so many of us adopt throughout the day, which often leads to strained and achy rhomboids and trapezius muscles.
Sphinx Pose is one of the most effective yoga poses for upper back pain because it builds foundational strength. By creating a mild spinal extension and engaging the upper back, you are essentially training your muscles to better support an upright, healthy posture long after you've left the mat.
How to Master Sphinx Pose
- Get into Position: Lie on your stomach with your legs extended straight behind you, about hip-width apart.
- Set Your Foundation: Prop yourself up on your forearms, placing your elbows directly under your shoulders and your forearms parallel to each other.
- Lift and Lengthen: Press firmly into your forearms and palms to lift your head and chest off the floor. Gently draw your shoulder blades down your back and broaden across your collarbones to open the chest.
- Engage and Hold: Keep your core lightly engaged to protect your lower back. Gaze forward and breathe steadily into your chest and upper back. Hold for 30 to 60 seconds, then gently release back down to the mat. Repeat 2 to 3 times.
Pro-Tips for Maximum Relief
- Mind the Shoulders: A common mistake is letting the shoulders creep up toward the ears. Actively press them down to create space and engage the correct upper back muscles.
- Lower Back Comfort: If you feel any pinching in your lower back, walk your elbows slightly forward to decrease the intensity of the backbend.
- Track Your Alignment: Proper spinal alignment is key to strengthening, not straining. Use Dalm's AI pose detection to get real-time feedback, ensuring your elbows are correctly placed and you're engaging the right muscle groups for optimal postural benefits.
7. Thread the Needle Pose (Parsva Balasana)
This pose is a game-changer for untangling the knots that form between your shoulder blades. Thread the Needle Pose offers a deep, targeted twist for the thoracic spine and a delicious stretch across the upper back and shoulders. It specifically hones in on the rhomboids and the posterior deltoids, areas that hold immense tension from hunching over desks and phones. By twisting the torso while one arm is extended, you create a gentle wringing-out action that releases stiffness and improves spinal mobility.
Unlike more upright stretches, this pose allows you to use your body weight to control the intensity. It's one of the most effective yoga poses for upper back pain because it combines a shoulder opening with a spinal twist, addressing two major sources of discomfort in one smooth, accessible movement.
How to Master Thread the Needle Pose
- Get into Position: Start on all fours in a tabletop position, with your wrists directly under your shoulders and your knees under your hips.
- Lift and Reach: Inhale and lift your right arm up towards the ceiling, opening your chest to the right side.
- Thread the Needle: Exhale and "thread" your right arm underneath your left arm, bringing your right shoulder and the side of your head to rest gently on the mat.
- Find Your Depth: Your left hand can stay where it is, or you can walk it forward for a deeper stretch. Alternatively, you can wrap it around your lower back. Relax into the twist, feeling the stretch across your upper back.
- Breathe and Hold: Hold for at least 30 seconds, breathing deeply into the space between your shoulder blades. To release, press into your left hand, inhale, and unwind, raising your right arm back to the ceiling before returning to tabletop. Repeat on the other side.
Pro-Tips for Maximum Relief
- Mind the Hips: Keep your hips lifted and stacked over your knees to maintain proper alignment and isolate the stretch in your upper back.
- Add Support: If your head doesn't comfortably reach the floor, place a yoga block or a folded blanket under it for support.
- Refine Your Form: Achieving the perfect twist without straining is key. Using a tool like Dalm's AI pose analysis helps you track your shoulder and hip alignment, ensuring you get a safe and effective stretch every time. This consistent feedback is vital as you explore deeper poses to improve your flexibility. To dive deeper into mobility, check out our guide on how to improve flexibility.
7-Pose Comparison: Upper Back Pain Relief
Beyond the Poses: Building a Pain-Free Upper Back for Life
You’ve just explored a fantastic arsenal of seven powerful yoga poses for upper back pain. From the gentle release of Child's Pose to the deep shoulder-opening of Cow Face Pose, each movement offers a unique pathway to relief. But the real magic isn't in performing these poses once; it's about weaving them into the fabric of your daily life. Think of this list not as a one-time prescription, but as your personal toolkit for building a resilient, ache-free upper back for years to come.
The journey from chronic tightness to lasting comfort is built on two key pillars: consistency and mindful awareness. A single, heroic yoga session might feel great, but it's the small, consistent efforts that retrain your muscles, improve your posture, and create profound, lasting change. You don't need an hour every day. The cumulative power of ten minutes is far greater than you think.
Making It Stick: Your Action Plan
So, how do you turn these poses into a sustainable habit? It's simpler than you imagine.
- The Morning Mobilizer (10 Minutes): Start your day with a short sequence to gently awaken your spine. Flow through 2-3 minutes of Cat-Cow, hold a Downward-Facing Dog for five deep breaths, and then relax into Sphinx Pose for another minute. This simple routine lubricates the joints and tells your postural muscles to wake up.
- The Workday Warrior Micro-Break (2 Minutes): Set a timer to stand up every hour. When it goes off, step away from your desk and practice Reverse Prayer Pose for 30 seconds. This is a discreet yet incredibly effective way to counteract the dreaded "desk slump" and open your chest.
- The Evening Unwind (5 Minutes): Before settling down for the night, release the day's tension. Find a comfortable spot for Thread the Needle on each side, followed by a restorative Child's Pose. This signals to your nervous system that it's time to relax and repair.
Precision is Power
As you integrate these practices, remember that how you perform the pose is just as important as that you perform it. Paying close attention to alignment cues, such as keeping your shoulders away from your ears in Downward Dog or engaging your core in Sphinx, is what transforms a simple stretch into a therapeutic tool. This is where listening to your body becomes your greatest skill. Notice the subtle shifts, the areas of resistance, and the moments of release. This feedback is invaluable.
By combining these potent yoga poses for upper back pain with a consistent, mindful approach, you’re doing more than just chasing away aches. You are actively investing in your long-term health, building a stronger foundation, and reclaiming a sense of ease and freedom in your own body. You're not just fixing a problem; you're building a better, more comfortable future, one breath at a time.
Ready to take the guesswork out of your alignment and accelerate your progress? The Dalm app uses advanced AI to provide real-time feedback on your form, ensuring you perform every pose safely and effectively. Download Dalm today and turn your practice into a precision tool for a pain-free back. Find out more at Dalm.